N: Difference between revisions
No edit summary |
No edit summary |
||
| Line 1: | Line 1: | ||
Various WIP things. | Various WIP things. | ||
Cleaner units navbox: | |||
{|class="mw-collapsible white-toggle-button {{#if:{{{collapsed|}}}|mw-collapsed}}" style="text-align:center;border-collapse:collapse;border: 1px solid #BCB096; width:100%;" | {|class="mw-collapsible white-toggle-button {{#if:{{{collapsed|}}}|mw-collapsed}}" style="text-align:center;border-collapse:collapse;border: 1px solid #BCB096; width:100%;" | ||
!{{{title|[[Units]]}}} | !{{{title|[[Units]]}}} | ||
|-style="border: 1px solid #BCB096;background-color:#F4CA16;" | |-style="border: 1px solid #BCB096;background-color:#F4CA16;" | ||
|{{F|Temple| | |{{F|Temple|{{{l|en}}}|color=white}} | ||
|-style="border: 1px solid #BCB096;" | |-style="border: 1px solid #BCB096;" | ||
|style="padding:4px;"| | |style="padding:4px;"| | ||
| Line 64: | Line 30: | ||
<div style="margin:1px;border: 1px solid #BCB096;background-color:grey;display:inline-block;vertical-align:top;text-align:center;">{{hint|[[File:Archangel icon.png|40px|link=Archangel{{LS|{{{l|}}}}}]]|{{UL|Archangel|{{{l|}}}|{{{t|}}}}}|0}}</div><div style="margin:1px;border: 1px solid #BCB096;background-color:grey;display:inline-block;vertical-align:top;text-align:center;">{{hint|[[File:Apotheosis icon.png|40px|link=Apotheosis{{LS|{{{l|}}}}}]]|{{UL|Apotheosis|{{{l|}}}|{{{t|}}}}}|0}}</div></div> | <div style="margin:1px;border: 1px solid #BCB096;background-color:grey;display:inline-block;vertical-align:top;text-align:center;">{{hint|[[File:Archangel icon.png|40px|link=Archangel{{LS|{{{l|}}}}}]]|{{UL|Archangel|{{{l|}}}|{{{t|}}}}}|0}}</div><div style="margin:1px;border: 1px solid #BCB096;background-color:grey;display:inline-block;vertical-align:top;text-align:center;">{{hint|[[File:Apotheosis icon.png|40px|link=Apotheosis{{LS|{{{l|}}}}}]]|{{UL|Apotheosis|{{{l|}}}|{{{t|}}}}}|0}}</div></div> | ||
|-style="border: 1px solid #BCB096;background-color:green;" | |-style="border: 1px solid #BCB096;background-color:green;" | ||
|{{F|Necropolis| | |{{F|Necropolis|{{{l|en}}}|color=white}} | ||
|-style="border: 1px solid #BCB096;" | |-style="border: 1px solid #BCB096;" | ||
|style="padding:4px;"| | |style="padding:4px;"| | ||
| Line 89: | Line 55: | ||
<div style="margin:1px;border: 1px solid #BCB096;background-color:grey;display:inline-block;vertical-align:top;text-align:center;">{{hint|[[File:Vampire Lord icon.png|40px|link=Vampire Lord{{LS|{{{l|}}}}}]]|{{UL|Vampire Lord|{{{l|}}}|{{{t|}}}}}|0}}</div><div style="margin:1px;border: 1px solid #BCB096;background-color:grey;display:inline-block;vertical-align:top;text-align:center;">{{hint|[[File:Vampire Scholar icon.png|40px|link=Vampire Scholar{{LS|{{{l|}}}}}]]|{{UL|Vampire Scholar|{{{l|}}}|{{{t|}}}}}|0}}</div></div> | <div style="margin:1px;border: 1px solid #BCB096;background-color:grey;display:inline-block;vertical-align:top;text-align:center;">{{hint|[[File:Vampire Lord icon.png|40px|link=Vampire Lord{{LS|{{{l|}}}}}]]|{{UL|Vampire Lord|{{{l|}}}|{{{t|}}}}}|0}}</div><div style="margin:1px;border: 1px solid #BCB096;background-color:grey;display:inline-block;vertical-align:top;text-align:center;">{{hint|[[File:Vampire Scholar icon.png|40px|link=Vampire Scholar{{LS|{{{l|}}}}}]]|{{UL|Vampire Scholar|{{{l|}}}|{{{t|}}}}}|0}}</div></div> | ||
|-style="border: 1px solid #BCB096;background-color:darkorange;" | |-style="border: 1px solid #BCB096;background-color:darkorange;" | ||
|{{F|Grove| | |{{F|Grove|{{{l|en}}}|color=white}} | ||
|-style="border: 1px solid #BCB096;" | |-style="border: 1px solid #BCB096;" | ||
|style="padding:4px;"| | |style="padding:4px;"| | ||
| Line 114: | Line 80: | ||
<div style="margin:1px;border: 1px solid #BCB096;background-color:grey;display:inline-block;vertical-align:top;text-align:center;">{{hint|[[File:Flaming Phoenix icon.png|40px|link=Flaming Phoenix{{LS|{{{l|}}}}}]]|{{UL|Flaming Phoenix|{{{l|}}}|{{{t|}}}}}|0}}</div><div style="margin:1px;border: 1px solid #BCB096;background-color:grey;display:inline-block;vertical-align:top;text-align:center;">{{hint|[[File:Energy Phoenix icon.png|40px|link=Energy Phoenix{{LS|{{{l|}}}}}]]|{{UL|Energy Phoenix|{{{l|}}}|{{{t|}}}}}|0}}</div></div> | <div style="margin:1px;border: 1px solid #BCB096;background-color:grey;display:inline-block;vertical-align:top;text-align:center;">{{hint|[[File:Flaming Phoenix icon.png|40px|link=Flaming Phoenix{{LS|{{{l|}}}}}]]|{{UL|Flaming Phoenix|{{{l|}}}|{{{t|}}}}}|0}}</div><div style="margin:1px;border: 1px solid #BCB096;background-color:grey;display:inline-block;vertical-align:top;text-align:center;">{{hint|[[File:Energy Phoenix icon.png|40px|link=Energy Phoenix{{LS|{{{l|}}}}}]]|{{UL|Energy Phoenix|{{{l|}}}|{{{t|}}}}}|0}}</div></div> | ||
|-style="border: 1px solid #BCB096;background-color:red;" | |-style="border: 1px solid #BCB096;background-color:red;" | ||
|{{F|Hive| | |{{F|Hive|{{{l|en}}}|color=white}} | ||
|-style="border: 1px solid #BCB096;" | |-style="border: 1px solid #BCB096;" | ||
|style="padding:4px;"| | |style="padding:4px;"| | ||
| Line 140: | Line 106: | ||
<div style="margin:1px;border: 1px solid #BCB096;background-color:grey;display:inline-block;vertical-align:top;text-align:center;">{{hint|[[File:Hive Queen icon.png|40px|link=Hive Queen{{LS|{{{l|}}}}}]]|{{UL|Hive Queen|{{{l|}}}|{{{t|}}}}}|0}}</div><br> | <div style="margin:1px;border: 1px solid #BCB096;background-color:grey;display:inline-block;vertical-align:top;text-align:center;">{{hint|[[File:Hive Queen icon.png|40px|link=Hive Queen{{LS|{{{l|}}}}}]]|{{UL|Hive Queen|{{{l|}}}|{{{t|}}}}}|0}}</div><br> | ||
<div style="margin:1px;border: 1px solid #BCB096;background-color:grey;display:inline-block;vertical-align:top;text-align:center;">{{hint|[[File:Hive Mother icon.png|40px|link=Hive Mother{{LS|{{{l|}}}}}]]|{{UL|Hive Mother|{{{l|}}}|{{{t|}}}}}|0}}</div><div style="margin:1px;border: 1px solid #BCB096;background-color:grey;display:inline-block;vertical-align:top;text-align:center;">{{hint|[[File:Hive Huntress icon.png|40px|link=Hive Huntress{{LS|{{{l|}}}}}]]|{{UL|Hive Huntress|{{{l|}}}|{{{t|}}}}}|0}}</div></div> | <div style="margin:1px;border: 1px solid #BCB096;background-color:grey;display:inline-block;vertical-align:top;text-align:center;">{{hint|[[File:Hive Mother icon.png|40px|link=Hive Mother{{LS|{{{l|}}}}}]]|{{UL|Hive Mother|{{{l|}}}|{{{t|}}}}}|0}}</div><div style="margin:1px;border: 1px solid #BCB096;background-color:grey;display:inline-block;vertical-align:top;text-align:center;">{{hint|[[File:Hive Huntress icon.png|40px|link=Hive Huntress{{LS|{{{l|}}}}}]]|{{UL|Hive Huntress|{{{l|}}}|{{{t|}}}}}|0}}</div></div> | ||
|-style="border: 1px solid #BCB096;background-color: | |-style="border: 1px solid #BCB096;background-color:darkblue;" | ||
|{{F|Schism| | |{{F|Schism|{{{l|en}}}|color=white}} | ||
|-style="border: 1px solid #BCB096;" | |-style="border: 1px solid #BCB096;" | ||
|style="padding:4px;"| | |style="padding:4px;"| | ||
| Line 165: | Line 131: | ||
<div style="margin:1px;border: 1px solid #BCB096;background-color:grey;display:inline-block;vertical-align:top;text-align:center;">{{hint|[[File:Abyssal Envoy icon.png|40px|link=Abyssal Envoy{{LS|{{{l|}}}}}]]|{{UL|Abyssal Envoy|{{{l|}}}|{{{t|}}}}}|0}}</div><br> | <div style="margin:1px;border: 1px solid #BCB096;background-color:grey;display:inline-block;vertical-align:top;text-align:center;">{{hint|[[File:Abyssal Envoy icon.png|40px|link=Abyssal Envoy{{LS|{{{l|}}}}}]]|{{UL|Abyssal Envoy|{{{l|}}}|{{{t|}}}}}|0}}</div><br> | ||
<div style="margin:1px;border: 1px solid #BCB096;background-color:grey;display:inline-block;vertical-align:top;text-align:center;">{{hint|[[File:Abyssal Overseer icon.png|40px|link=Abyssal Overseer{{LS|{{{l|}}}}}]]|{{UL|Abyssal Overseer|{{{l|}}}|{{{t|}}}}}|0}}</div><div style="margin:1px;border: 1px solid #BCB096;background-color:grey;display:inline-block;vertical-align:top;text-align:center;">{{hint|[[File:Abyssal Executor icon.png|40px|link=Abyssal Executor{{LS|{{{l|}}}}}]]|{{UL|Abyssal Executor|{{{l|}}}|{{{t|}}}}}|0}}</div></div> | <div style="margin:1px;border: 1px solid #BCB096;background-color:grey;display:inline-block;vertical-align:top;text-align:center;">{{hint|[[File:Abyssal Overseer icon.png|40px|link=Abyssal Overseer{{LS|{{{l|}}}}}]]|{{UL|Abyssal Overseer|{{{l|}}}|{{{t|}}}}}|0}}</div><div style="margin:1px;border: 1px solid #BCB096;background-color:grey;display:inline-block;vertical-align:top;text-align:center;">{{hint|[[File:Abyssal Executor icon.png|40px|link=Abyssal Executor{{LS|{{{l|}}}}}]]|{{UL|Abyssal Executor|{{{l|}}}|{{{t|}}}}}|0}}</div></div> | ||
|-style="border: 1px solid #BCB096;background-color: | |-style="border: 1px solid #BCB096;background-color:purple;" | ||
|{{F|Dungeon| | |{{F|Dungeon|{{{l|en}}}|color=white}} | ||
|-style="border: 1px solid #BCB096;" | |-style="border: 1px solid #BCB096;" | ||
|style="padding:4px;"| | |style="padding:4px;"| | ||
Revision as of 17:33, 22 June 2026
Various WIP things.
Cleaner units navbox:
| Units |
|---|
 Temple |
 Necropolis |
 Grove |
 Hive |
 Schism |
 Dungeon |
| Neutral |
| Units Overview |


Draft for skill odds table:
| Skill | Rates per Level UpWeights per Level Up (Toggle percentage/weights) | ||||||
| Normal | Special | ||||||
| Every 4th level4, 8, 12, 16, 24, 28, 32, 36, 40, 44, 48 | Every 5th level5, 10, 15, 25, 30≤30 | Level 20 | |||||
| Offense |  If not known |
20%200 | 20%200 | 20%200 | 20%200 | ||
 If known, but below Expert level |
|||||||
| Defense |  If not known |
||||||
 If known, but below Expert level |
|||||||
Creature overview info cards:

|
Sentinel of Glory Faction Tier III |
 Creature Type  Attack Type | |||||||||||||||||||||||||||||||||||
| |||||||||||||||||||||||||||||||||||||


Spell infobox test:
Colors
| School | Main Color | Ring Color |
|---|---|---|
| Daylight | #62410F | #c49714 |
| Nightshade | #3F1B52 | #6b3486 |
| Primal | #67281B | #c40700 |
| Arcane | #1C444F | #106278 |
| Neutral | #383765 | #2f4ab7 |
1. Daylight spell, main colour #62410F, ligher colour: see from game file; others less fancy for now for demonstration purposes
| Haste | ||||||
| ||||||
| Effect | ||||||
| Description of effects | ||||||
| Effects at higher levels | ||||||
| Lv. 2 | Effects at level 2 | |||||
| Lv. 3 | Effects at level 3 | |||||
| Lv. 4 | Effects at level 4 | |||||
| Masterful Version | ||||||
| Effect of masterful version | ||||||
| Specialist Heroes | ||||||



| Haste | |||||

| |||||
| Tier | Mana | Cooldown | |||
| I | 99 
|
2 turns | |||
| |||||
| Effect | |||||
| Description of effects | |||||
| Effects at higher levels | |||||
| Lv. 2 | Effects at level 2 | ||||
| Lv. 3 | Effects at level 3 | ||||
| Lv. 4 | Effects at level 4 | ||||
| Masterful Version | |||||
| Effect of masterful version | |||||
| Specialist Heroes | |||||


2. Nightshade spell, main colour #3F1B52
| Fatal Decay | ||
| Tier IV |

|
Mana 99
|
School Daylight Magic |
Type Battle Spell | |
| Effect | ||
| Description of effects | ||
| Effects at higher levels | ||
| Level 2 | Effects at level 2 | |
| Level 3 | Effects at level 3 | |
| Level 4 | Effects at level 4 | |
| Masterful Version | ||
| Effect of masterful version | ||
| Specialist Heroes | ||
3. Primal spell, main colour #67281B
| Hksmilla's Rampage | ||
| Tier IV |

|
Mana 99
|
| School Daylight Magic |
Type Battle Spell | |
| Effect | ||
| Description of effects | ||
| Effects at higher levels | ||
| Level 2 | Effects at level 2 | |
| Level 3 | Effects at level 3 | |
| Level 4 | Effects at level 4 | |
| Masterful Version | ||
| Effect of masterful version | ||
| Specialist Heroes | ||
4. Arcane spell, main colour #1C444F
| Doreath's Tide | ||
| Tier IV |

|
Mana 99
|
| School Daylight Magic |
Type Battle Spell | |
| Effect | ||
| Description of effects | ||
| Effects at higher levels | ||
| Level 2 | Effects at level 2 | |
| Level 3 | Effects at level 3 | |
| Level 4 | Effects at level 4 | |
| Masterful Version | ||
| Effect of masterful version | ||
| Specialist Heroes | ||
Grove Palace Test
 |
Grove Palace II |
| Requirements: Grove Palace I | |
| Cost | Effect |
2,500  5  5 
|
Grants the kingdom 750 Gold, Law points, and Astrology points daily. Allows the owner to pick one level-II economy upgrade:
|


Mage Guild
| File:Nature build magic guild level 1 test.png | Mage Guild I |
| Requirements: None. | |
| Cost | Effect |
| 2,500 5
|
Unlocks 7 random tier-1 spells in the Magic Observatory and the ability to spend dust to upgrade tier-1 spells or unlock additional ones. When heroes visit the city, all unlocked tier-1 spells are added to their Spellbook. |
 |
Mage Guild II |
| Requirements: Mage Guild I | |
| Cost | Effect |
2,500 2  2  2 
|
Unlocks 6 random tier-2 spells in the Magic Observatory and the ability to spend dust to upgrade tier-2 spells or unlock additional ones. When heroes visit the city, all unlocked tier-1–2 spells are added to their Spellbook. |
 |
Mage Guild III |
| Requirements: Mage Guild II | |
| Cost | Effect |
| 2,500 3 3 3
|
Unlocks 5 random tier-3 spells in the Magic Observatory and the ability to spend dust to upgrade tier-3 spells or unlock additional ones. When heroes visit the city, all unlocked tier-1–3 spells are added to their Spellbook. |
 |
Mage Guild IV |
| Requirements: Mage Guild III | |
| Cost | Effect |
| 2,500 4 4 4
|
Unlocks 4 random tier-4 spells in the Magic Observatory and the ability to spend dust to upgrade tier-4 spells or unlock additional ones. When heroes visit the city, all unlocked tier-1–4 spells are added to their Spellbook. |
 |
Mage Guild III |
| Requirements: Mage Guild IV | |
| Cost | Effect |
| 2,500 5 5 5
|
Unlocks 3 random tier-5 spells in the Magic Observatory and the ability to spend dust to upgrade tier-5 spells or unlock additional ones. When heroes visit the city, all unlocked tier-1–5 spells are added to their Spellbook. |
Main page banner adjustment


Building table WIP
Building:
| File:Building icon.png | Building Name Cost: |
| Requirements, in case it has any: | |
| (description of building, adapted from ingame text. If upgrade choices, does one of - first choice - second choice - third choice; end of description) Additional notes, but further detail probably for individual building pages later. |
Improved active ability table looks: all active ability stats handily in one place
- Cost in focus charges, if any
- Cooldown, if any
- Ability tier - important for various immunities
- Type of active ability - attack modifier/special/positive effect etc - needed?
Option: like for Creature type memo, a ribbon
 |
Ingame description by Kelarr, son of Navarr |
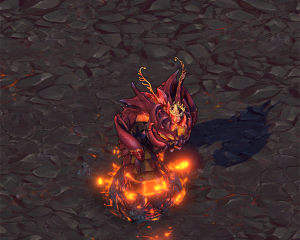
| Marked by the demonic corruption, some waurmos developed hardened scales and a fiery crown. Any traveler should beware, for these monstrous creatures are capable of swallowing entire patrols whole. | |
Creature Description Placement Idea + Fancier Ability Table + Active Ability Ribbon
| |||
| |||
| Faction |  Hive | ||
| Tier | VI | ||
| Cost (Upg. Cost) |
1900 (700 )
| ||
| Base Growth | +2 | ||
| SquadValue | 2250 | ||
| Stats | |||
 Health |
 Attack |
 Defense |
 Damage |
| 120 | 20 | 20 | 24 This stat is higher compared to the base unit.-26This stat is higher compared to the base unit. |
 Morale |
 Luck |
 Initiative |
 Speed |
| 0 | 3This stat is higher compared to the base unit.
|
8 | 10This stat is higher compared to the base unit.
|
| Related Units | |||
| Base unit | Waurms | ||
| Upgrade A | Devourer | ||
| Upgrade B | Pyroboros | ||
| Internal ID | |||
| olgoi_upg | |||

Devourers are upgraded tier-VI units of the Hive faction. They can be recruited from Burning Soul Burrows II.
They are one of the upgrades of the Waurms, the other being the Pyroboros.
Description
| Marked by the demonic corruption, some waurmos developed hardened scales and a fiery crown. Any traveler should beware, for these monstrous creatures are capable of swallowing entire patrols whole. |
Abilities
 |
Creature Type Hive Spawn  -5 to 5 |  -5 to 5 |  Yes |
| Part of a hivemind that serves a powerful lord from beyond. Morale range: –5 to 5. Luck range: –5 to 5. Fallen Hive Spawn count towards the power of Necromancy reanimation after battle. | |
 |
Attack Type Melee Attack |
| Can only attack adjacent enemies. Provokes counterattacks. | |
 |
Movement Type Blink |
| Instead of normal movement, teleports ignoring obstacles and traps. | |
 |
Passive Ability Hivemind: Nest Protector |
| At the start of battle, for each other unique Hive creature in the army, this creature’s Defense increases by 1 and Damage taken from Lucky Strikes reduces by 5%. | |
 |
Alternative Attack Fighting Style: Hit & Run |
| Returns to original position after attacking but deals -50% damage. Does not spend Focus Charges. This provokes counterattacks. | |
 |
Active Ability Remnant of Mad Times Special - Attack Modifier |
Tier III | Cost:  | Cooldown: M turns | |
| This attack deals no Damage. Instead, if the target has fewer than 40% of its original units, it is destroyed immediately. An enemy killed this way leaves no corpse. |
Strategy
Devourers are good for so and so, but be careful about this and that and such and such


