





World Map modifiers: Difference between revisions
Anteprefix (talk | contribs) |
mNo edit summary |
||
| (39 intermediate revisions by 4 users not shown) | |||
| Line 1: | Line 1: | ||
{{Version|1. | {{Version|1.11.1}} | ||
[[File:World map modifiers.png|thumb|Different World Map modifiers]] | [[File:World map modifiers.png|thumb|Different World Map modifiers]] | ||
== Overview == | == Overview == | ||
The [[World Map]] is full of things waiting to be discovered. Every point of interest in the fog of war is marked with a question mark and may turn out to be either a modifier or a [[ | The [[World Map]] is full of things waiting to be discovered. Every point of interest in the fog of war is marked with a question mark and may turn out to be either a modifier or a [[World Events|World Event]]. | ||
World modifiers add effects or conditions to any settlements built next to the tile the modifier is on. You cannot settle directly on these tiles or move your caravan through them directly, effectively shortening your embarkation range near them. Some of these effects are beneficial and make your mission easier, and others add challenging constraints or significant limitations on your settlement. | World modifiers add effects or conditions to any settlements built next to the tile the modifier is on. You cannot settle directly on these tiles or move your caravan through them directly, effectively shortening your embarkation range near them. Some of these effects are beneficial and make your mission easier, and others add challenging constraints or significant limitations on your settlement. | ||
To accept a modifier challenge, simply settle on a map tile adjacent to it. After you win a game near it, the | To accept a modifier challenge, simply settle on a map tile adjacent to it. After you win a game near it, the modifier will disappear and you'll be [[#Modifiers_and_meta_resource_rewards|rewarded with additional Citadel Resources]] and, if the modifier was negative, a [[#Royal Resupply|special supply box]]. | ||
== List of positive world modifiers == | == List of positive world modifiers == | ||
| Line 15: | Line 15: | ||
|+ World modifiers that benefit settlements | |+ World modifiers that benefit settlements | ||
! World modifier !! Rewards !!class=unsortable| Description | ! World modifier !! Rewards !!class=unsortable| Description | ||
|- | |- | ||
| {{Perk|{{PerkGreen}}|File:AbandonedSettlement.png}} Abandoned Settlement | | {{Perk|{{PerkGreen}}|File:AbandonedSettlement.png}} Abandoned Settlement | ||
| {{rl|Food Stockpiles|medium|display=notext}} | |||
| Another Viceroy tried to settle this area, but unfortunately failed... You start with a small destroyed settlement (3 [[Ruins]]) in your initial glade. | | Another Viceroy tried to settle this area, but unfortunately failed... You start with a small destroyed settlement (3 [[Ruins]]) in your initial glade. | ||
|- | |- | ||
| {{Perk|{{PerkGreen}}|File:FertileGrounds.png}} Fertile Grounds | | {{Perk|{{PerkGreen}}|File:FertileGrounds.png}} Fertile Grounds | ||
| {{rl|Food Stockpiles|medium|display=notext}} | |||
| Glades have an increased chance of including [[Fertile Soil]] (around +44%)< | | Glades have an increased chance of including [[Fertile Soil]] (around +44%)<ref>Testing done by Discord user @.jhazrun https://discord.com/channels/418545968666116096/716220199182925825/1196665391787823234</ref>. | ||
|- | |- | ||
| {{Perk|{{PerkGreen}}|File:ForsakenGodsTemple.png}} Forsaken Gods Temple | | {{Perk|{{PerkGreen}}|File:ForsakenGodsTemple.png}} Forsaken Gods Temple | ||
| {{rl|Artifacts|medium|display=notext}} | |||
| The Forsaken Gods' blessings can be ambiguous. You have a higher chance of receiving timed [[Order]]s from the Crown. | | The Forsaken Gods' blessings can be ambiguous. You have a higher chance of receiving timed [[Order]]s from the Crown. | ||
|- | |- | ||
| {{Perk|{{PerkGreen}}|File:LevitatingMonument.png}} Levitating Monument | | {{Perk|{{PerkGreen}}|File:LevitatingMonument.png}} Levitating Monument | ||
| {{rl|Artifacts|medium|display=notext}} | |||
| The power of a nearby monument makes everything feel lighter. You can move most [[buildings]] in your settlement. | | The power of a nearby monument makes everything feel lighter. You can move most [[buildings]] in your settlement. | ||
|- | |- | ||
| {{Perk|{{PerkGreen}}|File:OverGrownLibrary.png}} Overgrown Library | | {{Perk|{{PerkGreen}}|File:OverGrownLibrary.png}} Overgrown Library | ||
| {{rl|Food Stockpiles|medium|display=notext}}{{rl|Machinery|medium|display=notext}} | |||
| A remnant of a bygone era, when royal archivists themselves ventured out into the wilderness in search of knowledge. The first [[blueprint]] choice is replaced by a Wildcard (you can choose one blueprint from all unlocked blueprints). | | A remnant of a bygone era, when royal archivists themselves ventured out into the wilderness in search of knowledge. The first [[blueprint]] choice is replaced by a Wildcard (you can choose one blueprint from all unlocked blueprints). | ||
|- | |- | ||
| {{Perk|{{PerkGreen}}|File:PetrifiedNecropolis.png}} Petrified Necropolis | | {{Perk|{{PerkGreen}}|File:PetrifiedNecropolis.png}} Petrified Necropolis | ||
| {{rl|Food Stockpiles|medium|display=notext}} | |||
| Rocks in this region have a very peculiar shape. And they smell funny... Gain 5 {{rl|Meat}} for every 10 {{rl|Stone}} or {{rl|Clay}} produced. | | Rocks in this region have a very peculiar shape. And they smell funny... Dead villagers turn to stone. Gain 5 {{rl|Meat}} for every 10 {{rl|Stone}} or {{rl|Clay}} produced. | ||
|- | |- | ||
| {{Perk|{{PerkGreen}}|File:RoyalOutpost.png}} Royal Outpost | | {{Perk|{{PerkGreen}}|File:RoyalOutpost.png}} Royal Outpost | ||
| {{rl|Food Stockpiles|medium|display=notext}} | |||
| The proximity of a Royal Outpost makes it easier to communicate with the crown. The pool of [[Orders|Order choices]] will increase by 1. | | The proximity of a Royal Outpost makes it easier to communicate with the crown. The pool of [[Orders|Order choices]] will increase by 1. | ||
|- | |- | ||
| {{Perk|{{PerkGreen}}|File:RuinedArmory.png}} Ruined Armory | | {{Perk|{{PerkGreen}}|File:RuinedArmory.png}} Ruined Armory | ||
| {{rl|Food Stockpiles|medium|display=notext}}{{rl|Machinery|medium|display=notext}} | |||
| An old abandoned armory, left behind after the Great Civil War. No villagers will die when attacking a [[trader]]. | | An old abandoned armory, left behind after the Great Civil War. No villagers will die when attacking a [[trader]]. | ||
|- | |- | ||
| {{Perk|{{PerkGreen}}|File:RuinsModifier.png}} Ruins | | {{Perk|{{PerkGreen}}|File:RuinsModifier.png}} Ruins | ||
| | | {{rl|Machinery|medium|display=notext}} | ||
| This region was settled very frequently in the past. The chance of finding [[Ruins]] in Glades is much higher. | | This region was settled very frequently in the past. The chance of finding [[Ruins]] in Glades is much higher. | ||
|- | |- | ||
| {{Perk|{{PerkGreen}}|File:WatchTower.png}} Watchtower | | {{Perk|{{PerkGreen}}|File:WatchTower.png}} Watchtower | ||
| {{rl|Food Stockpiles|medium|display=notext}} | |||
| The Royal Guard is watching over this region. Discovering [[Glades]] doesn't increase [[Hostility]]. | | The Royal Guard is watching over this region. Discovering [[Glades]] doesn't increase [[Hostility]]. | ||
|} | |} | ||
| Line 62: | Line 62: | ||
|+ World modifiers that make missions harder | |+ World modifiers that make missions harder | ||
! World modifier !! Rewards !!class=unsortable| Description | ! World modifier !! Rewards !!class=unsortable| Description | ||
|- | |- | ||
| {{Perk|Red|File:AncientBattleground.png}} Ancient Battleground | | {{Perk|Red|File:AncientBattleground.png}} Ancient Battleground | ||
| {{rl|Artifacts|medium|display=notext}}{{rl|Machinery|medium|display=notext}} | |||
| This land was once the place of a mythical battle. You start with 50/75/100/150 extra [[Hostility]] points (Hostility scales based on [[difficulty]]). | | This land was once the place of a mythical battle. You start with 50/75/100/150 extra [[Hostility]] points (Hostility scales based on [[difficulty]]). | ||
|- | |- | ||
| {{Perk|Red|File:b_04.png}} Ancient Spire | |||
| {{rl|Food Stockpiles|medium|display=notext}}{{rl|Artifacts|medium|display=notext}} | |||
| An ominous structure made from a material not known to contemporary scholars. Clouds swirl around the tip of this giant tower. [[Seasons]] have random durations: Drizzle and Clearance: 33% - 133%; Storm: 75% - 175%<ref>1.11.1 Rebel Hideout update. https://eremitegames.com/rebel-hideout-update-1-11/</ref>. | |||
|- | |||
| {{Perk|Red|File:BanditCamp.png}} Bandit Camp | | {{Perk|Red|File:BanditCamp.png}} Bandit Camp | ||
| {{rl|Artifacts|medium|display=notext}}{{rl|Machinery|medium|display=notext}} | |||
| [[Traders]] are afraid, and will not visit this area. Neither [[trading]] nor [[#Trade Routes|trade routes]] are available. | | [[Traders]] are afraid, and will not visit this area. Neither [[trading]] nor [[#Trade Routes|trade routes]] are available. | ||
|- | |- | ||
| {{Perk|Red|File:BarrenLands.png}} Barren Lands | | {{Perk|Red|File:BarrenLands.png}} Barren Lands | ||
| | | {{rl|Machinery|medium|display=notext}} | ||
| The soil is too acidic. There is no [[Fertile Soil]] anywhere in this region. | | The soil is too acidic. There is no [[Fertile Soil]] anywhere in this region. | ||
|- | |- | ||
| {{Perk|Red|File:CorrosiveTorrent.png}} Corrosive Torrent | | {{Perk|Red|File:CorrosiveTorrent.png}} Corrosive Torrent | ||
| | | {{rl|Machinery|medium|display=notext}} | ||
| The rain is especially toxic in this region. No [[resources]] will be refunded after destroying a [[building]]. | | The rain is especially toxic in this region. No [[resources]] will be refunded after destroying a [[building]]. | ||
|- | |- | ||
| {{Perk|Red|File:DangerousLands.png}} Dangerous Lands | | {{Perk|Red|File:DangerousLands.png}} Dangerous Lands | ||
| | | {{rl|Machinery|medium|display=notext}} | ||
| Only [[#Glades#Dangerous_Glades|Dangerous Glades]] can be found in this region. | | Only [[#Glades#Dangerous_Glades|Dangerous Glades]] can be found in this region. | ||
|- | |- | ||
| {{Perk|Red|File:Icon Modifier Drylands.png}} Drylands | | {{Perk|Red|File:Icon Modifier Drylands.png}} Drylands* | ||
| | | {{rl|Machinery|medium|display=notext}} | ||
| For some reason, even in а world of constant rain, some regions have по underground water reservoirs. This area doesn't have any [[Rainwater Geyser]]s. | | For some reason, even in а world of constant rain, some regions have по underground water reservoirs. This area doesn't have any [[Rainwater Geyser]]s. | ||
|- | |- | ||
| {{Perk|Red|File:FishmenRitualSite.png}} Fishmen Ritual Site | | {{Perk|Red|File:FishmenRitualSite.png}} Fishmen Ritual Site | ||
| {{rl|Artifacts|medium|display=notext}} | |||
| A holy site for the Fishmen. No envoy dares to pass through here. [[Orders]] are disabled. | | A holy site for the Fishmen. No envoy dares to pass through here. [[Orders]] are disabled. | ||
|- | |- | ||
| {{Perk|Red|File:FloodedMines.png}} Flooded Mines | | {{Perk|Red|File:FloodedMines.png}} Flooded Mines | ||
| {{rl|Artifacts|medium|display=notext}}{{rl|Machinery|medium|display=notext}} | |||
| This region was heavily exploited by other viceroys. [[Hostility]] doesn't grow with each passing year, but you’ll gain 2/3/4/6 more Hostility per [[villager]] (Hostility scales based on [[difficulty]]). | | This region was heavily exploited by other viceroys. [[Hostility]] doesn't grow with each passing year, but you’ll gain 2/3/4/6 more Hostility per [[villager]] (Hostility scales based on [[difficulty]]). | ||
|- | |- | ||
| {{Perk|Red|File:ForbiddenLands.png}} Forbidden Lands | | {{Perk|Red|File:ForbiddenLands.png}} Forbidden Lands | ||
| {{rl|Artifacts|medium|display=notext}}{{rl|Machinery|medium|display=notext}} | |||
| Only [[#Glades#Forbidden_Glades|Forbidden Glades]] can be found in this region. | | Only [[#Glades#Forbidden_Glades|Forbidden Glades]] can be found in this region. | ||
|- | |- | ||
| {{Perk|Red|File:Frosts.png}} Frosts | | {{Perk|Red|File:Frosts.png}} Frosts | ||
| | | {{rl|Machinery|medium|display=notext}} | ||
| A bizarre cold rises from below and engulfs the Sacred Flame. Reduces the radius of [[Hearths]] by 3 tiles (down to 6). | | A bizarre cold rises from below and engulfs the Sacred Flame. Reduces the radius of [[Hearths]] by 3 tiles (down to 6). | ||
|- | |- | ||
| {{Perk|Red|File:GatheringStorm.png}} Gathering Storm | | {{Perk|Red|File:GatheringStorm.png}} Gathering Storm | ||
| {{rl|Artifacts|medium|display=notext}}{{rl|Machinery|medium|display=notext}} | |||
| A mysterious force is drawing in heavy clouds. Every year, the storm lasts | | A mysterious force is drawing in heavy clouds. Every year, the storm lasts 25% longer (additive). | ||
|- | |- | ||
| {{Perk|Red|File:Order_Generic 3.png}} Guild Territory | |||
| {{rl|Artifacts|medium|display=notext}}{{rl|Machinery|medium|display=notext}} | |||
| By royal decree, this land belongs to the Merchant Guild, and only its appointed representatives may settle here. You begin with a single villager per [[species]]. Additional villagers from [[Embarkation]] Bonuses and [[World Events]] are not granted. | |||
|- | |||
| {{Perk|Red|File:HauntedForest.png}} Haunted Forest | | {{Perk|Red|File:HauntedForest.png}} Haunted Forest | ||
| {{rl|Artifacts|medium|display=notext}} | |||
| Sometimes, viceroys condemn their people to a terrible fate... Dangerous and Forbidden [[Glade]] warnings are disabled. | | Sometimes, viceroys condemn their people to a terrible fate... Dangerous and Forbidden [[Glade]] warnings are disabled. | ||
|- | |- | ||
| {{Perk|Red|File:LandOfGreed.png}} Land of Greed | | {{Perk|Red|File:LandOfGreed.png}} Land of Greed | ||
| | | {{rl|Machinery|medium|display=notext}} | ||
| The strange totem causes you to only focus on your wealth... And the Crown is worried. [[Impatience]] grows 50% quicker, but every ongoing [[#Trade Route|trade route]] reduces the Impatience generation speed by 20%. | | The strange totem causes you to only focus on your wealth... And the Crown is worried. [[Impatience]] grows 50% quicker, but every ongoing [[#Trade Route|trade route]] reduces the Impatience generation speed by 20%. | ||
|- | |- | ||
| {{Perk|Red|File:MonasteryoftheHolyFlame'.png}} Monastery of the Holy Flame | | {{Perk|Red|File:MonasteryoftheHolyFlame'.png}} Monastery of the Holy Flame | ||
| {{rl|Artifacts|medium|display=notext}}{{rl|Machinery|medium|display=notext}} | |||
| The Monks of the Holy Flame are a fanatically egalitarian order. You cannot [[Consumption Control | forbid consumption]], or [[favor]] any species. | | The Monks of the Holy Flame are a fanatically egalitarian order. You cannot [[Consumption Control | forbid consumption]], or [[favor]] any species. | ||
|- | |- | ||
| {{Perk|Red|File:Caravanner Portrait.png}} Ominous Presence | | {{Perk|Red|File:Caravanner Portrait.png}} Ominous Presence | ||
| {{rl|Artifacts|medium|display=notext}} | |||
| Something strange is trapped beneath the ground. Gain twice the [[Hostility]] each year (+15/22/30/45 depending on [[difficulty]]), but every time a [[villager]] dies or leaves, Hostility decreases by 15 (doesn't scale, always -15). | | Something strange is trapped beneath the ground. Gain twice the [[Hostility]] each year (+15/22/30/45 depending on [[difficulty]]), but every time a [[villager]] dies or leaves, Hostility decreases by 15 (doesn't scale, always -15). | ||
|- | |- | ||
| {{Perk|Red|File: | | {{Perk|Red|File:Rebel Hideout.png}} Rebel Hideout | ||
| | | {{rl|Artifacts|medium|display=notext}}{{rl|Machinery|medium|display=notext}} | ||
| Strange things happen on the road to your settlement. Some villagers simply… never show up. Your settlement is limited to two species. | |||
|- | |||
| {{Perk|Red|File:Icon Modifier Riverlands.png}} Riverlands* | |||
| {{rl|Artifacts|medium|display=notext}}{{rl|Machinery|medium|display=notext}} | |||
| A region crisscrossed by countless rivers, both large and small. Usable land is scarce, as most of the terrain is either flooded or split by waterways. Your settlement starts on a small, isolated island. | | A region crisscrossed by countless rivers, both large and small. Usable land is scarce, as most of the terrain is either flooded or split by waterways. Your settlement starts on a small, isolated island. | ||
|- | |- | ||
| {{Perk|Red|File:ShatteredObelisk.png}} Shattered Obelisk | | {{Perk|Red|File:ShatteredObelisk.png}} Shattered Obelisk | ||
| {{rl|Artifacts|medium|display=notext}}{{rl|Machinery|medium|display=notext}} | |||
| You are unable to use the pause function. | | You are unable to use the pause function. | ||
|- | |- | ||
| {{Perk|Red|File:Icon Modifier SilentDominion.png}} Silent Dominion | | {{Perk|Red|File:Icon Modifier SilentDominion.png}} Silent Dominion* | ||
| {{rl|Artifacts|medium|display=notext}} | |||
| This place опсе held great significance for the ancients. Even now, а mysterious guardian still watches over it. You are not allowed to have more than 3 yearly [[Cornerstones]] at a time. | | This place опсе held great significance for the ancients. Even now, а mysterious guardian still watches over it. You are not allowed to have more than 3 yearly [[Cornerstones]] at a time (you get to choose which of the three Cornerstones to discard when picking the fourth one). | ||
|- | |- | ||
| {{Perk|Red|File:SparkdewCrystals.png}} Sparkdew Crystals | | {{Perk|Red|File:SparkdewCrystals.png}} Sparkdew Crystals | ||
| {{rl|Artifacts|medium|display=notext}} | |||
| The crown warned you not to settle near giant Sparkdew Crystals. Start with 6 [[Impatience]]. | | The crown warned you not to settle near giant Sparkdew Crystals. Start with 6 [[Impatience]]. | ||
|- | |- | ||
| {{Perk|Red|File:StatueoftheForefathers.png}} Statue of the Forefathers | | {{Perk|Red|File:StatueoftheForefathers.png}} Statue of the Forefathers | ||
| {{rl|Artifacts|medium|display=notext}}{{rl|Machinery|medium|display=notext}} | |||
| A crumbling statue depicting an unknown species. You can choose from 1 fewer [[Cornerstones]]. | | A crumbling statue depicting an unknown species. You can choose from 1 fewer [[Cornerstones]] (can't go below 1). | ||
|- | |||
| {{Perk|Red|File:SGI_01.png}} Sacred Grove | |||
| {{rl|Food Stockpiles|medium|display=notext}}{{rl|Artifacts|medium|display=notext}} | |||
| A revered site commemorating the peace forged after the Great Civil War. Your settlement can have four [[species]] at once, but you cannot choose [[Newcomer]] groups. Each [[Drizzle|Drizzle season]], you gain 1 random villager for each discovered [[glade]] (including the starting glade). | |||
|- | |- | ||
| {{Perk|Red|File:UntamedWilds.png}} Untamed Wilds | | {{Perk|Red|File:UntamedWilds.png}} Untamed Wilds | ||
| {{rl|Artifacts|medium|display=notext}}{{rl|Machinery|medium|display=notext}} | |||
| Nobody has settled in this region for multiple cycles. Every Dangerous and Forbidden Glade contains two threats instead of one (except Glades with Archaeological Discoveries in the [[Scarlet Orchard]]). | | Nobody has settled in this region for multiple cycles. Every Dangerous and Forbidden Glade contains two threats instead of one (except Glades with Archaeological Discoveries in the [[Scarlet Orchard]]). | ||
|} | |} | ||
<nowiki>*</nowiki> Nightwatchers DLC exclusive modifier | |||
== Modifiers and meta resource rewards == | == Modifiers and meta resource rewards == | ||
< | |||
=== Positive modifiers === | |||
{| class="wikitable mw-collapsible" | |||
|- | |||
|+ Rewards at different difficulties | |||
|- | |||
! Modifier | |||
! Resource | |||
! Settler | |||
! Pioneer | |||
! Veteran | |||
! Viceroy | |||
! Prestige 5 | |||
! Prestige 10 | |||
! Prestige 15 | |||
! Prestige 20 | |||
|- | |||
| {{Perk|{{PerkGreen}}|File:AbandonedSettlement.png}} Abandoned Settlement | |||
| style="text-align:center;" | {{rl|Food Stockpiles|medium|display=notext}} | |||
| 5 | |||
| 13 | |||
| 21 | |||
| 26 | |||
| 29 | |||
| 31 | |||
| 33 | |||
| 42 | |||
|- | |||
| {{Perk|{{PerkGreen}}|File:FertileGrounds.png}} Fertile Grounds | |||
| style="text-align:center;" | {{rl|Food Stockpiles|medium|display=notext}} | |||
| 3 | |||
| 6 | |||
| 10 | |||
| 13 | |||
| 14 | |||
| 16 | |||
| 17 | |||
| 21 | |||
|- | |||
| {{Perk|{{PerkGreen}}|File:ForsakenGodsTemple.png}} Forsaken Gods Temple | |||
| style="text-align:center;" | {{rl|Artifacts|medium|display=notext}} | |||
| 5 | |||
| 13 | |||
| 21 | |||
| 26 | |||
| 29 | |||
| 31 | |||
| 34 | |||
| 42 | |||
|- | |||
| {{Perk|{{PerkGreen}}|File:LevitatingMonument.png}} Levitating Monument | |||
| style="text-align:center;" | {{rl|Artifacts|medium|display=notext}} | |||
| 3 | |||
| 6 | |||
| 10 | |||
| 13 | |||
| 14 | |||
| 16 | |||
| 17 | |||
| 21 | |||
|- | |||
| {{Perk|{{PerkGreen}}|File:OverGrownLibrary.png}} Overgrown Library | |||
| style="text-align:center;" | {{rl|Food Stockpiles|medium|display=notext}} <br/> {{rl|Machinery|medium|display=notext}} | |||
| 4 <br/> 5 | |||
| 10 <br/> 13 | |||
| 16 <br/> 21 | |||
| 20 <br/> 26 | |||
| 21 <br/> 29 | |||
| 23 <br/> 31 | |||
| 26 <br/> 34 | |||
| 31 <br/> 42 | |||
|- | |||
| {{Perk|{{PerkGreen}}|File:PetrifiedNecropolis.png}} Petrified Necropolis | |||
| style="text-align:center;" | {{rl|Food Stockpiles|medium|display=notext}} | |||
| 5 | |||
| 13 | |||
| 21 | |||
| 26 | |||
| 29 | |||
| 31 | |||
| 33 | |||
| 42 | |||
|- | |||
| {{Perk|{{PerkGreen}}|File:RoyalOutpost.png}} Royal Outpost | |||
| style="text-align:center;" | {{rl|Food Stockpiles|medium|display=notext}} | |||
| 4 | |||
| 10 | |||
| 16 | |||
| 20 | |||
| 21 | |||
| 23 | |||
| 26 | |||
| 31 | |||
|- | |||
| {{Perk|{{PerkGreen}}|File:RuinedArmory.png}} Ruined Armory | |||
| style="text-align:center;" | {{rl|Food Stockpiles|medium|display=notext}} <br/> {{rl|Machinery|medium|display=notext}} | |||
| 3 <br/> 4 | |||
| 6 <br/> 10 | |||
| 10 <br/> 16 | |||
| 13 <br/> 20 | |||
| 14 <br/> 21 | |||
| 16 <br/> 23 | |||
| 17 <br/> 26 | |||
| 21 <br/> 31 | |||
|- | |||
| {{Perk|{{PerkGreen}}|File:RuinsModifier.png}} Ruins | |||
| style="text-align:center;" | {{rl|Machinery|medium|display=notext}} | |||
| 4 | |||
| 10 | |||
| 16 | |||
| 20 | |||
| 21 | |||
| 23 | |||
| 26 | |||
| 31 | |||
|- | |||
| {{Perk|{{PerkGreen}}|File:WatchTower.png}} Watchtower | |||
| style="text-align:center;" | {{rl|Food Stockpiles|medium|display=notext}} | |||
| 4 | |||
| 10 | |||
| 16 | |||
| 20 | |||
| 21 | |||
| 23 | |||
| 26 | |||
| 31 | |||
|} | |||
=== Negative modifiers === | |||
{| class="wikitable mw-collapsible" | |||
|- | |||
|+ Rewards at different difficulties | |||
|- | |||
! Modifier | |||
! Resource | |||
! Settler | |||
! Pioneer | |||
! Veteran | |||
! Viceroy | |||
! Prestige 5 | |||
! Prestige 10 | |||
! Prestige 15 | |||
! Prestige 20 | |||
|- | |||
| {{Perk|Red|File:AncientBattleground.png}} Ancient Battleground | |||
| {{rl|Artifacts|medium|display=notext}} <br/> {{rl|Machinery|medium|display=notext}} | |||
| 5 <br/> 5 | |||
| 13 <br/> 13 | |||
| 21 <br/> 21 | |||
| 26 <br/> 26 | |||
| 29 <br/> 29 | |||
| 31 <br/> 31 | |||
| 34 <br/> 34 | |||
| 42 <br/> 42 | |||
|- | |||
| {{Perk|Red|File:b_04.png}} Ancient Spire | |||
| {{rl|Food Stockpiles|medium|display=notext}} <br/> {{rl|Artifacts|medium|display=notext}} | |||
| 4 <br/> 3 | |||
| 10 <br/> 6 | |||
| 16 <br/> 10 | |||
| 20 <br/> 13 | |||
| 21 <br/> 14 | |||
| 23 <br/> 16 | |||
| 26 <br/> 17 | |||
| 31 <br/> 21 | |||
|- | |||
| {{Perk|Red|File:BanditCamp.png}} Bandit Camp | |||
| {{rl|Artifacts|medium|display=notext}} <br/> {{rl|Machinery|medium|display=notext}} | |||
| 4 <br/> 4 | |||
| 10 <br/> 10 | |||
| 16 <br/> 16 | |||
| 20 <br/> 20 | |||
| 21 <br/> 21 | |||
| 23 <br/> 23 | |||
| 26 <br/> 26 | |||
| 31 <br/> 31 | |||
|- | |||
| {{Perk|Red|File:BarrenLands.png}} Barren Lands | |||
| {{rl|Machinery|medium|display=notext}} | |||
| 5 | |||
| 13 | |||
| 21 | |||
| 26 | |||
| 29 | |||
| 31 | |||
| 33 | |||
| 42 | |||
|- | |||
| {{Perk|Red|File:CorrosiveTorrent.png}} Corrosive Torrent | |||
| {{rl|Machinery|medium|display=notext}} | |||
| 5 | |||
| 13 | |||
| 21 | |||
| 26 | |||
| 29 | |||
| 31 | |||
| 33 | |||
| 42 | |||
|- | |||
| {{Perk|Red|File:DangerousLands.png}} Dangerous Lands | |||
| {{rl|Machinery|medium|display=notext}} | |||
| 5 | |||
| 13 | |||
| 21 | |||
| 26 | |||
| 29 | |||
| 31 | |||
| 33 | |||
| 42 | |||
|- | |||
| {{Perk|Red|File:Icon Modifier Drylands.png}} Drylands* | |||
| {{rl|Machinery|medium|display=notext}} | |||
| 5 | |||
| 13 | |||
| 21 | |||
| 26 | |||
| 29 | |||
| 31 | |||
| 33 | |||
| 42 | |||
|- | |||
| {{Perk|Red|File:FishmenRitualSite.png}} Fishmen Ritual Site | |||
| {{rl|Artifacts|medium|display=notext}} | |||
| 8 | |||
| 16 | |||
| 26 | |||
| 32 | |||
| 36 | |||
| 39 | |||
| 42 | |||
| 52 | |||
|- | |||
| {{Perk|Red|File:FloodedMines.png}} Flooded Mines | |||
| {{rl|Artifacts|medium|display=notext}} <br/> {{rl|Machinery|medium|display=notext}} | |||
| 4 <br/> 4 | |||
| 10 <br/> 10 | |||
| 16 <br/> 16 | |||
| 20 <br/> 20 | |||
| 21 <br/> 21 | |||
| 23 <br/> 23 | |||
| 26 <br/> 26 | |||
| 31 <br/> 31 | |||
|- | |||
| {{Perk|Red|File:ForbiddenLands.png}} Forbidden Lands | |||
| {{rl|Artifacts|medium|display=notext}} <br/> {{rl|Machinery|medium|display=notext}} | |||
| 5 <br/> 5 | |||
| 13 <br/> 13 | |||
| 21 <br/> 21 | |||
| 26 <br/> 26 | |||
| 29 <br/> 29 | |||
| 31 <br/> 31 | |||
| 34 <br/> 34 | |||
| 42 <br/> 42 | |||
|- | |||
| {{Perk|Red|File:Frosts.png}} Frosts | |||
| {{rl|Machinery|medium|display=notext}} | |||
| 5 | |||
| 13 | |||
| 21 | |||
| 26 | |||
| 29 | |||
| 31 | |||
| 33 | |||
| 42 | |||
|- | |||
| {{Perk|Red|File:GatheringStorm.png}} Gathering Storm | |||
| {{rl|Artifacts|medium|display=notext}} <br/> {{rl|Machinery|medium|display=notext}} | |||
| 4 <br/> 4 | |||
| 10 <br/> 10 | |||
| 16 <br/> 16 | |||
| 20 <br/> 20 | |||
| 21 <br/> 21 | |||
| 23 <br/> 23 | |||
| 26 <br/> 26 | |||
| 31 <br/> 31 | |||
|- | |||
| {{Perk|Red|File:Order_Generic 3.png}} Guild Territory | |||
| {{rl|Artifacts|medium|display=notext}} <br/> {{rl|Machinery|medium|display=notext}} | |||
| 5 <br/> 5 | |||
| 13 <br/> 13 | |||
| 21 <br/> 21 | |||
| 26 <br/> 26 | |||
| 29 <br/> 29 | |||
| 31 <br/> 31 | |||
| 34 <br/> 34 | |||
| 42 <br/> 42 | |||
|- | |||
| {{Perk|Red|File:HauntedForest.png}} Haunted Forest | |||
| {{rl|Artifacts|medium|display=notext}} | |||
| 5 | |||
| 13 | |||
| 21 | |||
| 26 | |||
| 29 | |||
| 31 | |||
| 34 | |||
| 42 | |||
|- | |||
| {{Perk|Red|File:LandOfGreed.png}} Land of Greed | |||
| {{rl|Machinery|medium|display=notext}} | |||
| 5 | |||
| 13 | |||
| 21 | |||
| 26 | |||
| 29 | |||
| 31 | |||
| 33 | |||
| 42 | |||
|- | |||
| {{Perk|Red|File:MonasteryoftheHolyFlame'.png}} Monastery of the Holy Flame | |||
| {{rl|Artifacts|medium|display=notext}} <br/> {{rl|Machinery|medium|display=notext}} | |||
| 4 <br/> 4 | |||
| 10 <br/> 10 | |||
| 16 <br/> 16 | |||
| 20 <br/> 20 | |||
| 21 <br/> 21 | |||
| 23 <br/> 23 | |||
| 26 <br/> 26 | |||
| 31 <br/> 31 | |||
|- | |||
| {{Perk|Red|File:Caravanner Portrait.png}} Ominous Presence | |||
| {{rl|Artifacts|medium|display=notext}} | |||
| 5 | |||
| 13 | |||
| 21 | |||
| 26 | |||
| 29 | |||
| 31 | |||
| 34 | |||
| 42 | |||
|- | |||
| {{Perk|Red|File:Rebel Hideout.png}} Rebel Hideout | |||
| {{rl|Artifacts|medium|display=notext}} <br/> {{rl|Machinery|medium|display=notext}} | |||
| 4 <br/> 4 | |||
| 10 <br/> 10 | |||
| 16 <br/> 16 | |||
| 20 <br/> 20 | |||
| 21 <br/> 21 | |||
| 23 <br/> 23 | |||
| 26 <br/> 26 | |||
| 31 <br/> 31 | |||
|- | |||
| {{Perk|Red|File:Icon Modifier Riverlands.png}} Riverlands* | |||
| {{rl|Artifacts|medium|display=notext}} <br/> {{rl|Machinery|medium|display=notext}} | |||
| 4 <br/> 4 | |||
| 10 <br/> 10 | |||
| 16 <br/> 16 | |||
| 20 <br/> 20 | |||
| 21 <br/> 21 | |||
| 23 <br/> 23 | |||
| 26 <br/> 26 | |||
| 31 <br/> 31 | |||
|- | |||
| {{Perk|Red|File:ShatteredObelisk.png}} Shattered Obelisk | |||
| {{rl|Artifacts|medium|display=notext}} <br/> {{rl|Machinery|medium|display=notext}} | |||
| 5 <br/> 5 | |||
| 13 <br/> 13 | |||
| 21 <br/> 21 | |||
| 26 <br/> 26 | |||
| 29 <br/> 29 | |||
| 31 <br/> 31 | |||
| 34 <br/> 34 | |||
| 42 <br/> 42 | |||
|- | |||
| {{Perk|Red|File:Icon Modifier SilentDominion.png}} Silent Dominion* | |||
| {{rl|Artifacts|medium|display=notext}} | |||
| 5 | |||
| 13 | |||
| 21 | |||
| 26 | |||
| 29 | |||
| 31 | |||
| 34 | |||
| 42 | |||
|- | |||
| {{Perk|Red|File:SparkdewCrystals.png}} Sparkdew Crystals | |||
| {{rl|Artifacts|medium|display=notext}} | |||
| 8 | |||
| 16 | |||
| 26 | |||
| 32 | |||
| 36 | |||
| 39 | |||
| 42 | |||
| 52 | |||
|- | |||
| {{Perk|Red|File:StatueoftheForefathers.png}} Statue of the Forefathers | |||
| {{rl|Artifacts|medium|display=notext}} <br/> {{rl|Machinery|medium|display=notext}} | |||
| 5 <br/> 5 | |||
| 13 <br/> 13 | |||
| 21 <br/> 21 | |||
| 26 <br/> 26 | |||
| 29 <br/> 29 | |||
| 31 <br/> 31 | |||
| 34 <br/> 34 | |||
| 42 <br/> 42 | |||
|- | |||
| {{Perk|Red|File:SGI_01.png}} Sacred Grove | |||
| {{rl|Food Stockpiles|medium|display=notext}} <br/> {{rl|Artifacts|medium|display=notext}} | |||
| 4 <br/> 3 | |||
| 10 <br/> 6 | |||
| 16 <br/> 10 | |||
| 20 <br/> 13 | |||
| 21 <br/> 14 | |||
| 23 <br/> 16 | |||
| 26 <br/> 17 | |||
| 31 <br/> 21 | |||
|- | |||
| {{Perk|Red|File:UntamedWilds.png}} Untamed Wilds | |||
| {{rl|Artifacts|medium|display=notext}} <br/> {{rl|Machinery|medium|display=notext}} | |||
| 5 <br/> 5 | |||
| 13 <br/> 13 | |||
| 21 <br/> 21 | |||
| 26 <br/> 26 | |||
| 29 <br/> 29 | |||
| 31 <br/> 31 | |||
| 34 <br/> 34 | |||
| 42 <br/> 42 | |||
|}<nowiki>*</nowiki> Nightwatchers DLC exclusive modifier | |||
== World Map generation == | == World Map generation == | ||
According to the patch notes for 0.57.1 Seal Contracts | Modifiers can appear at any distance from the [[Citadel]], as long as the tile is not directly adjacent to it. Positive and negative modifiers have different weighting depending on the distance: | ||
* Positive modifiers have a higher chance of appearing near the Smoldering City, and a lower chance of spawning far away.<ref name="multiple">0.53.2 Cycles Reforged update. https://eremitegames.com/cycles-reforged-update/</ref> | |||
* Negative modifiers have a higher chance of spawning further away, and a lower chance of appearing near the Smoldering City.<ref name="multiple">0.53.2 Cycles Reforged update. https://eremitegames.com/cycles-reforged-update/</ref> | |||
According to the patch notes for 0.57.1 Seal Contracts update<ref>0.57.1 Seal Contracts Update patch notes. https://eremitegames.com/seal-contracts-update/</ref>, once the Gold [[Seal]] has been reforged, the number of modifiers spawned increases. Additionally, the probability of positive modifiers spawning decreases in favor of negative modifiers. | |||
=== Restrictions === | === Restrictions === | ||
Modifiers can't spawn next to [[World Events]]. Identical modifiers can't spawn next to each other. Additionally, not all modifiers can spawn next to all biomes. A number of [[biome]]-modifier combinations are avoided during World Map generation to prevent conflicts and "free" rewards. All restrictions still apply when using | Modifiers can't spawn next to [[World Events]]. Identical modifiers can't spawn next to each other. Additionally, not all modifiers can spawn next to all biomes. A number of [[biome]]-modifier combinations are avoided during [[World Map]] generation to prevent conflicts and "free" rewards. All restrictions still apply when using [[World Events#Sadrath_the_Wise|Sadrath the Wise]] World Event to spawn modifiers. | ||
{| class="wikitable" style="vertical-align:bottom;" | {| class="wikitable" style="vertical-align:bottom;" | ||
| Line 211: | Line 650: | ||
Each time a settlement is successfully completed next to a negative modifier, players are rewarded with a Royal Resupply. Royal Resupplies present a choice between 3 options: | Each time a settlement is successfully completed next to a negative modifier, players are rewarded with a Royal Resupply. Royal Resupplies present a choice between 3 options: | ||
* +2 Vision and [[Embarkation]] range for the next settlement. | * Caravan Wagons: | ||
* 4 Reserve Embarkation points (reserve Embarkation points last till the end of the current cycle). | ** +2 Vision and [[Embarkation]] range on the [[World Map]] for the next settlement. | ||
* 5 [[Sealed_Forest#Requirements_for_Entry| Seal Fragments]]. | * Supply Package: | ||
** 4 Reserve Embarkation points (reserve Embarkation points last till the end of the current cycle). | |||
* Obisidian Box: | |||
** 5 [[File:SealFragment.png|{{ImgS}}]] [[Sealed_Forest#Requirements_for_Entry| Seal Fragments]]. | |||
It is possible to get up to 3 Royal Resupplies after a single settlement. World Map generation doesn't allow for more modifiers to spawn within range of a single settlement. | It is possible to get up to 3 Royal Resupplies after a single settlement. World Map generation doesn't allow for more modifiers to spawn within range of a single settlement. | ||
| Line 219: | Line 661: | ||
The game doesn't allow the next settlement to start before all Royal Resupplies are spent. Royal Resupplies can transfer to the next World Map cycle, should you force close the current one or simply run out of time. | The game doesn't allow the next settlement to start before all Royal Resupplies are spent. Royal Resupplies can transfer to the next World Map cycle, should you force close the current one or simply run out of time. | ||
{{clear}} | {{clear}} | ||
== Additional information and strategies == | == Additional information and strategies == | ||
== Positive modifiers == | === Positive modifiers === | ||
=== Abandoned Settlement === | ==== Abandoned Settlement ==== | ||
Example of a starting [[Glade]] generated for an Abandoned Settlement in [[Bamboo Flats]]: | Example of a starting [[Glade]] generated for an Abandoned Settlement in [[Bamboo Flats]]: | ||
| Line 228: | Line 671: | ||
{{clear}} | {{clear}} | ||
=== Levitating Monument === | ==== Levitating Monument ==== | ||
The only unmovable [[buildings]] with the Levitating Monument buff are: | The only unmovable [[buildings]] with the Levitating Monument buff are: | ||
| Line 235: | Line 678: | ||
* [[Geyser Pumps]] | * [[Geyser Pumps]] | ||
=== Overgrown Library === | ==== Overgrown Library ==== | ||
Due to the fact that the Wildcard [[blueprint]] pick is provided before the other starting blueprints, it's usually best to go for something generalist that's guaranteed to pay off: {{bl|Workshop}}, {{bl|Lumber Mill}}, or a [[Complex Food]] building best suited your [[species]]. | Due to the fact that the Wildcard [[blueprint]] pick is provided before the other starting blueprints, it's usually best to go for something generalist that's guaranteed to pay off: {{bl|Workshop}}, {{bl|Lumber Mill}}, or a [[Complex Food]] building best suited your [[species]]. | ||
=== Petrified Necropolis === | ==== Petrified Necropolis ==== | ||
This modifier is extremely strong in [[Rocky Ravine]]. | This modifier is extremely strong in [[Rocky Ravine]]. | ||
| Line 250: | Line 693: | ||
* {{rl|Sea Marrow}} (10%) | * {{rl|Sea Marrow}} (10%) | ||
=== Royal Outpost === | ==== Royal Outpost ==== | ||
It is still possible to get Timed [[Orders]] with this modifier active. They occupy the fourth Order slot. | It is still possible to get Timed [[Orders]] with this modifier active. They occupy the fourth Order slot. | ||
=== Ruins === | ==== Ruins ==== | ||
This modifier synergizes well with {{bl|Academy}}'s effect - consider going for a {{species link|Bat}} [[Caravan]] if they are available, since Academy is a {{species link|Bat}}-specific [[blueprint]]. Ruins modifier also makes all [[Ruins]]-related Orders much more consistent. | This modifier synergizes well with {{bl|Academy}}'s effect - consider going for a {{species link|Bat}} [[Caravan]] if they are available, since Academy is a {{species link|Bat}}-specific [[blueprint]]. Ruins modifier also makes all [[Ruins]]-related Orders much more consistent. | ||
=== Watchtower === | ==== Watchtower ==== | ||
This is by far the strongest positive modifier. Exploring without regard for Glades' [[Hostility]] cost is universally strong. With Watchtower, there is no reason not to open [[Glades#Small_Glades|Small Glades]]. Small Glades are the best place to look for Drizzle [[Rainpunk#Rainwater_Geysers|Geysers]]. Free Small Glades guarantee a [[Scarlet Orchard]] dig site. All on-Glade-discovery [[effects]] are trivial to proc. Without Glade Hostility you can take on more [[villagers]] before it becomes a problem. There isn't as much need for Hostility-decreasing Cornerstones. However, {{species link|Foxes}}' [[Firekeeper]] ability is useless in Watchtower settlements. | This is by far the strongest positive modifier. Exploring without regard for Glades' [[Hostility]] cost is universally strong. With Watchtower, there is no reason not to open [[Glades#Small_Glades|Small Glades]]. Small Glades are the best place to look for Drizzle [[Rainpunk#Rainwater_Geysers|Geysers]]. Free Small Glades guarantee a [[Scarlet Orchard]] dig site. All on-Glade-discovery [[effects]] are trivial to proc. Without Glade Hostility you can take on more [[villagers]] before it becomes a problem. There isn't as much need for Hostility-decreasing Cornerstones. However, {{species link|Foxes}}' [[Firekeeper]] ability is useless in Watchtower settlements. | ||
== Negative modifiers == | === Negative modifiers === | ||
=== Ancient Battleground === | ==== Ancient Battleground ==== | ||
On higher difficulties, this modifier is one of the most difficult out of all the negative modifiers. It's even possible for initial Resolve to be negative with high starting population + woodcutting, forcing you to reduce the number of {{bl|Woodcutters' Camp}} lumberjacks in year I. If it's absolutely necessary to settle near an Ancient Battleground, you can consider lowering the settlement difficulty to below your normal comfort zone if you're having trouble dealing with the extra [[Hostility]]. | On higher difficulties, this modifier is one of the most difficult out of all the negative modifiers. It's even possible for initial Resolve to be negative with high starting population + woodcutting, forcing you to reduce the number of {{bl|Woodcutters' Camp}} lumberjacks in year I. If it's absolutely necessary to settle near an Ancient Battleground, you can consider lowering the settlement difficulty to below your normal comfort zone if you're having trouble dealing with the extra [[Hostility]]. | ||
=== | ==== Ancient Spire ==== | ||
Unlike most modifiers in the game, the [[season]] length duration modifier from Ancient Spire is multiplicative. At [[Prestige]] 2, Storm duration can reach 7 minutes with a high roll. Without any other effects active, Drizzle and Clearance duration falls between 80 and 320 seconds. | |||
=== | ==== Bandit Camp ==== | ||
All trading-based [[Orders]], [[Perks]], and [[Cornerstones]] are disabled. | |||
With trading unavailable, careful selection of [[Blueprints]] and Orders is even more important than usual, since you cannot receive extra Blueprints by purchasing them from [[Traders]], and you cannot increase your villagers' Resolve by purchasing Food, Clothing, or Service goods from them. | |||
=== Corrosive Torrent === | ==== Barren Lands ==== | ||
All Fertile Soil or farming-based [[Ruins]], Orders, Perks, and Cornerstones are disabled. | |||
With no Fertile Soil to be found anywhere, the {{Species link|Humans}} starting ability, proficiency, and species-specific [[Housing Upgrades|housing upgrade]] are useless. On the plus side, the Barren Lands modifier also removes all Fertile Soil buildings from the Blueprint pool, making it more likely for you to find other Blueprints that could be more useful to you, such as an appropriate Camp blueprint or a key Food Production or Industry blueprint. Unfortunately, the missing Fertile Soil is not replaced by any other Glade Resources. | |||
==== Corrosive Torrent ==== | |||
The main threat of Corrosive Torrent is a potential {{rl|Parts}} deficiency. {{rl|Planks}}, {{rl|Bricks}}, and {{rl|Fabric}} are relatively easy to manufacture or purchase in case of a shortage, but Parts are nearly impossible to manufacture and cost a fortune to purchase from [[Traders]], if they're even available. Be careful of how many Parts you dedicate to constructing Camps, especially on Prestige 6+ difficulty, as you will not be able to destroy the Camps to refund them. | The main threat of Corrosive Torrent is a potential {{rl|Parts}} deficiency. {{rl|Planks}}, {{rl|Bricks}}, and {{rl|Fabric}} are relatively easy to manufacture or purchase in case of a shortage, but Parts are nearly impossible to manufacture and cost a fortune to purchase from [[Traders]], if they're even available. Be careful of how many Parts you dedicate to constructing Camps, especially on Prestige 6+ difficulty, as you will not be able to destroy the Camps to refund them. | ||
==== Fishmen Ritual Site ==== | |||
'''{{c|{{PerkOrange}}|Trade Hub}}''' and '''{{c|{{PerkOrange}}|Queen's Gift}}''' [[Cornerstones]] are disabled. | |||
==== Gathering Storm ==== | |||
Like most effects in the game, Gathering Storm's season duration increase is additive. It adds 30 seconds to each subsequent Storm, starting year 1. It does not scale with the [[Prestige]] 2 effect (+100% Storm duration). | |||
==== Haunted Forest ==== | |||
While the [[Glade]] warnings are removed, the placement of big Glade types relative to the starting Glade and the edge of the map is retained. You are unlikely to find Forbiddens in the immediate vicinity of the starting Glade, outside of [[Coastal Grove]]. | |||
==== Monastery of the Holy Flame ==== | |||
'''{{c|{{PerkOrange}}|Counterfeit Amber}}''' and '''{{c|{{PerkOrange}}|Without Restrictions}}''' [[Cornerstones]] are disabled. | |||
==== Riverlands ==== | |||
===== Mutually Exclusive Modifiers ===== | |||
As of Hotfix 1.8.10<ref>1.8.10 Hotfix patch notes. https://steamcommunity.com/games/1336490/announcements/detail/541113388287132035</ref>, Riverlands is restricted from spawning next to the following modifiers: | |||
* {{c|{{ColorRed}}|Forbidden Lands}} | |||
* {{c|{{ColorRed}}|Dangerous Lands}} | |||
* {{c|{{ColorRed}}|Untamed Lands}} | |||
* {{c|{{ColorGreen}}|Ruins}} | |||
Map generation examples: | |||
<gallery mode=nolines class="left" widths="150px" heights="150px"> | |||
AT riverlands example.png | Ashen Thicket | |||
BF riverlands example.png | Bamboo Flats | |||
CG riverlands example.png | Coastal Grove | |||
CF riverlands example.png | Coral Forest | |||
RR riverlands example.png | Rocky Ravine | |||
RW riverlands example.png | Royal Woodlands | |||
</gallery> | |||
Due to the order of priority for Glade Resources to populate during map generation, Fertile Soil and Small Glade [[Traders]] are more likely to be encountered than normal. Selling goods via [[Trade Route]] to obtain {{rl|Amber}} to purchase goods and services from Traders and prioritizing at least 1 Farming or Fertile Soil Blueprint are likely to pay off. Exceptions include modifiers like '''Barren Lands''' or '''Bandit Camp''' which prevent Fertile Soil and Traders from spawning, respectively, and the [[biomes]] [[Rocky Ravine]], which has low soil fertility, and [[Bamboo Flats]], which starts with no [[Fertile Soil]] at all. | |||
{| class="wikitable mw-collapsible" | |||
|+ Fertile Soil Statistics <ref name="soil">Testing done by Discord user @Anteprefix. n=5 for Riverlands testing, n=1 for No Modifiers comparison.</ref> | |||
! Biome !! Avg. Fertile Soil Patches !! Avg. Total Glades !! Avg. % Fertile Soil Glades (Riverlands) !! Avg. % Fertile Soil Glades (No Modifier) | |||
|- | |||
| Ashen Thicket || 4.6 || 6.8 || 67.5% || 29.6% | |||
|- | |||
| Bamboo Flats || 0 || 7 || 0.0% || 0.0% | |||
|- | |||
| Coastal Grove || 3 || 5.2 || 58.3% || 37.0% | |||
|- | |||
| Coral Forest || 3.4 || 6 || 59.1% || 26.9% | |||
|- | |||
| Rocky Ravine || 2.8 || 6.4 || 43.8% || 14.6% | |||
|- | |||
| Royal Woodlands || 4 || 6.8 || 58.2% || 48.6% | |||
|} | |||
{| class="wikitable mw-collapsible mw-collapsed" | |||
|+ Full Data Table <ref name="soil">Testing done by Discord user @Anteprefix. n=5 for Riverlands testing, n=1 for No Modifiers comparison.</ref> | |||
! Biome !! Data Type !! Settlement 1 !! Settlement 2 !! Settlement 3 !! Settlement 4 !! Settlement 5 | |||
|- | |||
| Ashen Thicket || Number of Fertile Soil Glades || 6 || 3 || 5 || 4 || 5 | |||
|- | |||
| || Total Number of Glades || 8 || 6 || 8 || 6 || 6 | |||
|- | |||
| || % Glades with Fertile Soil || 75.0% || 50.0% || 62.5% || 66.7% || 83.3% | |||
|- | |||
| Bamboo Flats || Number of Fertile Soil Glades || 0 || 0 || 0 || 0 || 0 | |||
|- | |||
| || Total Number of Glades || 8 || 6 || 9 || 5 || 7 | |||
|- | |||
| || % Glades with Fertile Soil || 0% || 0% || 0% || 0% || 0% | |||
|- | |||
| Coastal Grove || Number of Fertile Soil Glades || 2 || 4 || 2 || 3 || 4 | |||
|- | |||
| || Total Number of Glades || 6 || 6 || 4 || 4 || 6 | |||
|- | |||
| || % Glades with Fertile Soil || 33.3% || 66.7% || 50.0% || 75.0% || 66.7% | |||
|- | |||
| Coral Forest || Number of Fertile Soil Glades || 4 || 2 || 4 || 3 || 4 | |||
|- | |||
| || Total Number of Glades || 5 || 7 || 7 || 6 || 5 | |||
|- | |||
| || % Glades with Fertile Soil || 80.0% || 28.6% || 57.1% || 50.0% || 80.0% | |||
|- | |||
| Rocky Ravine || Number of Fertile Soil Glades || 0 || 3 || 4 || 4 || 3 | |||
|- | |||
| || Total Number of Glades || 6 || 7 || 6 || 6 || 7 | |||
|- | |||
| || % Glades with Fertile Soil || 0.0% || 42.9% || 66.7% || 66.7% || 42.9% | |||
|- | |||
| Royal Woodlands || Number of Fertile Soil Glades || 4 || 5 || 2 || 4 || 5 | |||
|- | |||
| || Total Number of Glades || 7 || 9 || 5 || 6 || 7 | |||
|- | |||
| || % Glades with Fertile Soil || 57.1% || 55.6% || 40.0% || 66.7% || 71.4% | |||
|} | |||
== References == | == References == | ||
<references /> | |||
Latest revision as of 13:07, 25 September 2026

Overview
The World Map is full of things waiting to be discovered. Every point of interest in the fog of war is marked with a question mark and may turn out to be either a modifier or a World Event.
World modifiers add effects or conditions to any settlements built next to the tile the modifier is on. You cannot settle directly on these tiles or move your caravan through them directly, effectively shortening your embarkation range near them. Some of these effects are beneficial and make your mission easier, and others add challenging constraints or significant limitations on your settlement.
To accept a modifier challenge, simply settle on a map tile adjacent to it. After you win a game near it, the modifier will disappear and you'll be rewarded with additional Citadel Resources and, if the modifier was negative, a special supply box.
List of positive world modifiers
| World modifier | Rewards | Description |
|---|---|---|
 Abandoned Settlement Abandoned Settlement
|

|
Another Viceroy tried to settle this area, but unfortunately failed... You start with a small destroyed settlement (3 Ruins) in your initial glade. |
 Fertile Grounds Fertile Grounds
|
|
Glades have an increased chance of including Fertile Soil (around +44%)[1]. |
 Forsaken Gods Temple Forsaken Gods Temple
|

|
The Forsaken Gods' blessings can be ambiguous. You have a higher chance of receiving timed Orders from the Crown. |
 Levitating Monument Levitating Monument
|
|
The power of a nearby monument makes everything feel lighter. You can move most buildings in your settlement. |
 Overgrown Library Overgrown Library
|

|
A remnant of a bygone era, when royal archivists themselves ventured out into the wilderness in search of knowledge. The first blueprint choice is replaced by a Wildcard (you can choose one blueprint from all unlocked blueprints). |
 Petrified Necropolis Petrified Necropolis
|
|
Rocks in this region have a very peculiar shape. And they smell funny... Dead villagers turn to stone. Gain 5  Meat for every 10 Meat for every 10  Stone or Stone or  Clay produced. Clay produced.
|
 Royal Outpost Royal Outpost
|
|
The proximity of a Royal Outpost makes it easier to communicate with the crown. The pool of Order choices will increase by 1. |
 Ruined Armory Ruined Armory
|
|
An old abandoned armory, left behind after the Great Civil War. No villagers will die when attacking a trader. |
 Ruins Ruins
|
|
This region was settled very frequently in the past. The chance of finding Ruins in Glades is much higher. |
 Watchtower Watchtower
|
|
The Royal Guard is watching over this region. Discovering Glades doesn't increase Hostility. |
List of negative world modifiers
| World modifier | Rewards | Description |
|---|---|---|
 Ancient Battleground Ancient Battleground
|
|
This land was once the place of a mythical battle. You start with 50/75/100/150 extra Hostility points (Hostility scales based on difficulty). |
 Ancient Spire Ancient Spire
|
|
An ominous structure made from a material not known to contemporary scholars. Clouds swirl around the tip of this giant tower. Seasons have random durations: Drizzle and Clearance: 33% - 133%; Storm: 75% - 175%[2]. |
 Bandit Camp Bandit Camp
|
|
Traders are afraid, and will not visit this area. Neither trading nor trade routes are available. |
 Barren Lands Barren Lands
|
|
The soil is too acidic. There is no Fertile Soil anywhere in this region. |
 Corrosive Torrent Corrosive Torrent
|
|
The rain is especially toxic in this region. No resources will be refunded after destroying a building. |
 Dangerous Lands Dangerous Lands
|
|
Only Dangerous Glades can be found in this region. |
 Drylands* Drylands*
|
|
For some reason, even in а world of constant rain, some regions have по underground water reservoirs. This area doesn't have any Rainwater Geysers. |
 Fishmen Ritual Site Fishmen Ritual Site
|
|
A holy site for the Fishmen. No envoy dares to pass through here. Orders are disabled. |
 Flooded Mines Flooded Mines
|
|
This region was heavily exploited by other viceroys. Hostility doesn't grow with each passing year, but you’ll gain 2/3/4/6 more Hostility per villager (Hostility scales based on difficulty). |
 Forbidden Lands Forbidden Lands
|
|
Only Forbidden Glades can be found in this region. |
 Frosts Frosts
|
|
A bizarre cold rises from below and engulfs the Sacred Flame. Reduces the radius of Hearths by 3 tiles (down to 6). |
 Gathering Storm Gathering Storm
|
|
A mysterious force is drawing in heavy clouds. Every year, the storm lasts 25% longer (additive). |
 Guild Territory Guild Territory
|
|
By royal decree, this land belongs to the Merchant Guild, and only its appointed representatives may settle here. You begin with a single villager per species. Additional villagers from Embarkation Bonuses and World Events are not granted. |
 Haunted Forest Haunted Forest
|
|
Sometimes, viceroys condemn their people to a terrible fate... Dangerous and Forbidden Glade warnings are disabled. |
 Land of Greed Land of Greed
|
|
The strange totem causes you to only focus on your wealth... And the Crown is worried. Impatience grows 50% quicker, but every ongoing trade route reduces the Impatience generation speed by 20%. |
 Monastery of the Holy Flame Monastery of the Holy Flame
|
|
The Monks of the Holy Flame are a fanatically egalitarian order. You cannot forbid consumption, or favor any species. |
 Ominous Presence Ominous Presence
|
|
Something strange is trapped beneath the ground. Gain twice the Hostility each year (+15/22/30/45 depending on difficulty), but every time a villager dies or leaves, Hostility decreases by 15 (doesn't scale, always -15). |
 Rebel Hideout Rebel Hideout
|
|
Strange things happen on the road to your settlement. Some villagers simply… never show up. Your settlement is limited to two species. |
 Riverlands* Riverlands*
|
|
A region crisscrossed by countless rivers, both large and small. Usable land is scarce, as most of the terrain is either flooded or split by waterways. Your settlement starts on a small, isolated island. |
 Shattered Obelisk Shattered Obelisk
|
|
You are unable to use the pause function. |
 Silent Dominion* Silent Dominion*
|
|
This place опсе held great significance for the ancients. Even now, а mysterious guardian still watches over it. You are not allowed to have more than 3 yearly Cornerstones at a time (you get to choose which of the three Cornerstones to discard when picking the fourth one). |
 Sparkdew Crystals Sparkdew Crystals
|
|
The crown warned you not to settle near giant Sparkdew Crystals. Start with 6 Impatience. |
 Statue of the Forefathers Statue of the Forefathers
|
|
A crumbling statue depicting an unknown species. You can choose from 1 fewer Cornerstones (can't go below 1). |
 Sacred Grove Sacred Grove
|
|
A revered site commemorating the peace forged after the Great Civil War. Your settlement can have four species at once, but you cannot choose Newcomer groups. Each Drizzle season, you gain 1 random villager for each discovered glade (including the starting glade). |
 Untamed Wilds Untamed Wilds
|
|
Nobody has settled in this region for multiple cycles. Every Dangerous and Forbidden Glade contains two threats instead of one (except Glades with Archaeological Discoveries in the Scarlet Orchard). |
* Nightwatchers DLC exclusive modifier
Modifiers and meta resource rewards
Positive modifiers
| Modifier | Resource | Settler | Pioneer | Veteran | Viceroy | Prestige 5 | Prestige 10 | Prestige 15 | Prestige 20 |
|---|---|---|---|---|---|---|---|---|---|
| Abandoned Settlement
|
|
5 | 13 | 21 | 26 | 29 | 31 | 33 | 42 |
| Fertile Grounds
|
|
3 | 6 | 10 | 13 | 14 | 16 | 17 | 21 |
| Forsaken Gods Temple
|
|
5 | 13 | 21 | 26 | 29 | 31 | 34 | 42 |
| Levitating Monument
|
|
3 | 6 | 10 | 13 | 14 | 16 | 17 | 21 |
| Overgrown Library
|
|
4 5 |
10 13 |
16 21 |
20 26 |
21 29 |
23 31 |
26 34 |
31 42 |
| Petrified Necropolis
|
|
5 | 13 | 21 | 26 | 29 | 31 | 33 | 42 |
| Royal Outpost
|
|
4 | 10 | 16 | 20 | 21 | 23 | 26 | 31 |
| Ruined Armory
|
|
3 4 |
6 10 |
10 16 |
13 20 |
14 21 |
16 23 |
17 26 |
21 31 |
| Ruins
|
|
4 | 10 | 16 | 20 | 21 | 23 | 26 | 31 |
| Watchtower
|
|
4 | 10 | 16 | 20 | 21 | 23 | 26 | 31 |
Negative modifiers
| Modifier | Resource | Settler | Pioneer | Veteran | Viceroy | Prestige 5 | Prestige 10 | Prestige 15 | Prestige 20 |
|---|---|---|---|---|---|---|---|---|---|
| Ancient Battleground
|
|
5 5 |
13 13 |
21 21 |
26 26 |
29 29 |
31 31 |
34 34 |
42 42 |
| Ancient Spire
|
|
4 3 |
10 6 |
16 10 |
20 13 |
21 14 |
23 16 |
26 17 |
31 21 |
| Bandit Camp
|
|
4 4 |
10 10 |
16 16 |
20 20 |
21 21 |
23 23 |
26 26 |
31 31 |
| Barren Lands
|
|
5 | 13 | 21 | 26 | 29 | 31 | 33 | 42 |
| Corrosive Torrent
|
|
5 | 13 | 21 | 26 | 29 | 31 | 33 | 42 |
| Dangerous Lands
|
|
5 | 13 | 21 | 26 | 29 | 31 | 33 | 42 |
| Drylands*
|
|
5 | 13 | 21 | 26 | 29 | 31 | 33 | 42 |
| Fishmen Ritual Site
|
|
8 | 16 | 26 | 32 | 36 | 39 | 42 | 52 |
| Flooded Mines
|
|
4 4 |
10 10 |
16 16 |
20 20 |
21 21 |
23 23 |
26 26 |
31 31 |
| Forbidden Lands
|
|
5 5 |
13 13 |
21 21 |
26 26 |
29 29 |
31 31 |
34 34 |
42 42 |
| Frosts
|
|
5 | 13 | 21 | 26 | 29 | 31 | 33 | 42 |
| Gathering Storm
|
|
4 4 |
10 10 |
16 16 |
20 20 |
21 21 |
23 23 |
26 26 |
31 31 |
| Guild Territory
|
|
5 5 |
13 13 |
21 21 |
26 26 |
29 29 |
31 31 |
34 34 |
42 42 |
| Haunted Forest
|
|
5 | 13 | 21 | 26 | 29 | 31 | 34 | 42 |
| Land of Greed
|
|
5 | 13 | 21 | 26 | 29 | 31 | 33 | 42 |
| Monastery of the Holy Flame
|
|
4 4 |
10 10 |
16 16 |
20 20 |
21 21 |
23 23 |
26 26 |
31 31 |
| Ominous Presence
|
|
5 | 13 | 21 | 26 | 29 | 31 | 34 | 42 |
| Rebel Hideout
|
|
4 4 |
10 10 |
16 16 |
20 20 |
21 21 |
23 23 |
26 26 |
31 31 |
| Riverlands*
|
|
4 4 |
10 10 |
16 16 |
20 20 |
21 21 |
23 23 |
26 26 |
31 31 |
| Shattered Obelisk
|
|
5 5 |
13 13 |
21 21 |
26 26 |
29 29 |
31 31 |
34 34 |
42 42 |
| Silent Dominion*
|
|
5 | 13 | 21 | 26 | 29 | 31 | 34 | 42 |
| Sparkdew Crystals
|
|
8 | 16 | 26 | 32 | 36 | 39 | 42 | 52 |
| Statue of the Forefathers
|
|
5 5 |
13 13 |
21 21 |
26 26 |
29 29 |
31 31 |
34 34 |
42 42 |
| Sacred Grove
|
|
4 3 |
10 6 |
16 10 |
20 13 |
21 14 |
23 16 |
26 17 |
31 21 |
| Untamed Wilds
|
|
5 5 |
13 13 |
21 21 |
26 26 |
29 29 |
31 31 |
34 34 |
42 42 |
* Nightwatchers DLC exclusive modifier
World Map generation
Modifiers can appear at any distance from the Citadel, as long as the tile is not directly adjacent to it. Positive and negative modifiers have different weighting depending on the distance:
- Positive modifiers have a higher chance of appearing near the Smoldering City, and a lower chance of spawning far away.[3]
- Negative modifiers have a higher chance of spawning further away, and a lower chance of appearing near the Smoldering City.[3]
According to the patch notes for 0.57.1 Seal Contracts update[4], once the Gold Seal has been reforged, the number of modifiers spawned increases. Additionally, the probability of positive modifiers spawning decreases in favor of negative modifiers.
Restrictions
Modifiers can't spawn next to World Events. Identical modifiers can't spawn next to each other. Additionally, not all modifiers can spawn next to all biomes. A number of biome-modifier combinations are avoided during World Map generation to prevent conflicts and "free" rewards. All restrictions still apply when using Sadrath the Wise World Event to spawn modifiers.
| Biome | Prevented World Map modifiers | |||||
|---|---|---|---|---|---|---|
 Bamboo Flats Bamboo Flats
|
Barren Lands | Fertile Grounds | ||||
 Rocky Ravine Rocky Ravine
|
Bandit Camp | |||||
 Ashen Thicket Ashen Thicket
|
None | |||||
 Coastal Grove Coastal Grove
|
None | |||||
 Coral Forest Coral Forest
|
None | |||||
 Cursed Royal Woodlands Cursed Royal Woodlands
|
Dangerous Lands | Forbidden lands | Haunted Forest | Monastery of the Holy Flame | Riverlands | Untamed Wilds |
 Marshlands Marshlands
|
Dangerous Lands | Forbidden Lands | Riverlands | Untamed Wilds | Ruins | |
 Royal Woodlands Royal Woodlands
|
None | |||||
 Scarlet Orchard Scarlet Orchard
|
Dangerous Lands | Forbidden Lands | Riverlands | |||
 Sealed Forest Sealed Forest
|
World Map modifiers can't generate next to Sealed Forest | |||||
Royal Resupply

Each time a settlement is successfully completed next to a negative modifier, players are rewarded with a Royal Resupply. Royal Resupplies present a choice between 3 options:
- Caravan Wagons:
- +2 Vision and Embarkation range on the World Map for the next settlement.
- Supply Package:
- 4 Reserve Embarkation points (reserve Embarkation points last till the end of the current cycle).
- Obisidian Box:

It is possible to get up to 3 Royal Resupplies after a single settlement. World Map generation doesn't allow for more modifiers to spawn within range of a single settlement.
The game doesn't allow the next settlement to start before all Royal Resupplies are spent. Royal Resupplies can transfer to the next World Map cycle, should you force close the current one or simply run out of time.
Additional information and strategies
Positive modifiers
Abandoned Settlement
Example of a starting Glade generated for an Abandoned Settlement in Bamboo Flats:

Levitating Monument
The only unmovable buildings with the Levitating Monument buff are:
Overgrown Library
Due to the fact that the Wildcard blueprint pick is provided before the other starting blueprints, it's usually best to go for something generalist that's guaranteed to pay off: Workshop, Lumber Mill, or a Complex Food building best suited your species.
Petrified Necropolis
This modifier is extremely strong in Rocky Ravine.
Dead villagers spawn small Stone nodes unique to this modifier. These nodes occupy the closest available tile, but can destroy roads. Stone and  Copper Ore are not refunded when their corresponding roads are destroyed in the process. Villagers exiled with the help of the Manorial Court won't spawn Stone nodes.
Petrified Necropolis Stone nodes have the following byproducts:
- Meat (20%)
 Leather (10%)
 Sea Marrow (10%)
Royal Outpost
It is still possible to get Timed Orders with this modifier active. They occupy the fourth Order slot.
Ruins
This modifier synergizes well with Academy's effect - consider going for a  Bats Caravan if they are available, since Academy is a Bats-specific blueprint. Ruins modifier also makes all Ruins-related Orders much more consistent.
Watchtower
This is by far the strongest positive modifier. Exploring without regard for Glades' Hostility cost is universally strong. With Watchtower, there is no reason not to open Small Glades. Small Glades are the best place to look for Drizzle Geysers. Free Small Glades guarantee a Scarlet Orchard dig site. All on-Glade-discovery effects are trivial to proc. Without Glade Hostility you can take on more villagers before it becomes a problem. There isn't as much need for Hostility-decreasing Cornerstones. However,  Foxes' Firekeeper ability is useless in Watchtower settlements.
Negative modifiers
Ancient Battleground
On higher difficulties, this modifier is one of the most difficult out of all the negative modifiers. It's even possible for initial Resolve to be negative with high starting population + woodcutting, forcing you to reduce the number of Woodcutters' Camp lumberjacks in year I. If it's absolutely necessary to settle near an Ancient Battleground, you can consider lowering the settlement difficulty to below your normal comfort zone if you're having trouble dealing with the extra Hostility.
Ancient Spire
Unlike most modifiers in the game, the season length duration modifier from Ancient Spire is multiplicative. At Prestige 2, Storm duration can reach 7 minutes with a high roll. Without any other effects active, Drizzle and Clearance duration falls between 80 and 320 seconds.
Bandit Camp
All trading-based Orders, Perks, and Cornerstones are disabled.
With trading unavailable, careful selection of Blueprints and Orders is even more important than usual, since you cannot receive extra Blueprints by purchasing them from Traders, and you cannot increase your villagers' Resolve by purchasing Food, Clothing, or Service goods from them.
Barren Lands
All Fertile Soil or farming-based Ruins, Orders, Perks, and Cornerstones are disabled.
With no Fertile Soil to be found anywhere, the  Humans starting ability, proficiency, and species-specific housing upgrade are useless. On the plus side, the Barren Lands modifier also removes all Fertile Soil buildings from the Blueprint pool, making it more likely for you to find other Blueprints that could be more useful to you, such as an appropriate Camp blueprint or a key Food Production or Industry blueprint. Unfortunately, the missing Fertile Soil is not replaced by any other Glade Resources.
Corrosive Torrent
The main threat of Corrosive Torrent is a potential  Parts deficiency.
  Planks,
  Bricks, and
  Fabric are relatively easy to manufacture or purchase in case of a shortage, but Parts are nearly impossible to manufacture and cost a fortune to purchase from Traders, if they're even available. Be careful of how many Parts you dedicate to constructing Camps, especially on Prestige 6+ difficulty, as you will not be able to destroy the Camps to refund them.
Fishmen Ritual Site
Trade Hub and Queen's Gift Cornerstones are disabled.
Gathering Storm
Like most effects in the game, Gathering Storm's season duration increase is additive. It adds 30 seconds to each subsequent Storm, starting year 1. It does not scale with the Prestige 2 effect (+100% Storm duration).
Haunted Forest
While the Glade warnings are removed, the placement of big Glade types relative to the starting Glade and the edge of the map is retained. You are unlikely to find Forbiddens in the immediate vicinity of the starting Glade, outside of Coastal Grove.
Monastery of the Holy Flame
Counterfeit Amber and Without Restrictions Cornerstones are disabled.
Riverlands
Mutually Exclusive Modifiers
As of Hotfix 1.8.10[5], Riverlands is restricted from spawning next to the following modifiers:
- Forbidden Lands
- Dangerous Lands
- Untamed Lands
- Ruins
Map generation examples:
-
 Ashen Thicket
 -
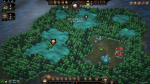 Bamboo Flats
 -
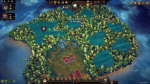 Coastal Grove
 -
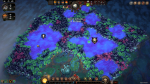 Coral Forest
 -
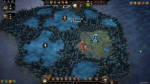 Rocky Ravine
 -
 Royal Woodlands


Due to the order of priority for Glade Resources to populate during map generation, Fertile Soil and Small Glade Traders are more likely to be encountered than normal. Selling goods via Trade Route to obtain  Amber to purchase goods and services from Traders and prioritizing at least 1 Farming or Fertile Soil Blueprint are likely to pay off. Exceptions include modifiers like Barren Lands or Bandit Camp which prevent Fertile Soil and Traders from spawning, respectively, and the biomes Rocky Ravine, which has low soil fertility, and Bamboo Flats, which starts with no Fertile Soil at all.
| Biome | Avg. Fertile Soil Patches | Avg. Total Glades | Avg. % Fertile Soil Glades (Riverlands) | Avg. % Fertile Soil Glades (No Modifier) |
|---|---|---|---|---|
| Ashen Thicket | 4.6 | 6.8 | 67.5% | 29.6% |
| Bamboo Flats | 0 | 7 | 0.0% | 0.0% |
| Coastal Grove | 3 | 5.2 | 58.3% | 37.0% |
| Coral Forest | 3.4 | 6 | 59.1% | 26.9% |
| Rocky Ravine | 2.8 | 6.4 | 43.8% | 14.6% |
| Royal Woodlands | 4 | 6.8 | 58.2% | 48.6% |
| Biome | Data Type | Settlement 1 | Settlement 2 | Settlement 3 | Settlement 4 | Settlement 5 |
|---|---|---|---|---|---|---|
| Ashen Thicket | Number of Fertile Soil Glades | 6 | 3 | 5 | 4 | 5 |
| Total Number of Glades | 8 | 6 | 8 | 6 | 6 | |
| % Glades with Fertile Soil | 75.0% | 50.0% | 62.5% | 66.7% | 83.3% | |
| Bamboo Flats | Number of Fertile Soil Glades | 0 | 0 | 0 | 0 | 0 |
| Total Number of Glades | 8 | 6 | 9 | 5 | 7 | |
| % Glades with Fertile Soil | 0% | 0% | 0% | 0% | 0% | |
| Coastal Grove | Number of Fertile Soil Glades | 2 | 4 | 2 | 3 | 4 |
| Total Number of Glades | 6 | 6 | 4 | 4 | 6 | |
| % Glades with Fertile Soil | 33.3% | 66.7% | 50.0% | 75.0% | 66.7% | |
| Coral Forest | Number of Fertile Soil Glades | 4 | 2 | 4 | 3 | 4 |
| Total Number of Glades | 5 | 7 | 7 | 6 | 5 | |
| % Glades with Fertile Soil | 80.0% | 28.6% | 57.1% | 50.0% | 80.0% | |
| Rocky Ravine | Number of Fertile Soil Glades | 0 | 3 | 4 | 4 | 3 |
| Total Number of Glades | 6 | 7 | 6 | 6 | 7 | |
| % Glades with Fertile Soil | 0.0% | 42.9% | 66.7% | 66.7% | 42.9% | |
| Royal Woodlands | Number of Fertile Soil Glades | 4 | 5 | 2 | 4 | 5 |
| Total Number of Glades | 7 | 9 | 5 | 6 | 7 | |
| % Glades with Fertile Soil | 57.1% | 55.6% | 40.0% | 66.7% | 71.4% |
References
- ↑ Testing done by Discord user @.jhazrun https://discord.com/channels/418545968666116096/716220199182925825/1196665391787823234
- ↑ 1.11.1 Rebel Hideout update. https://eremitegames.com/rebel-hideout-update-1-11/
- ↑ 3.0 3.1 0.53.2 Cycles Reforged update. https://eremitegames.com/cycles-reforged-update/
- ↑ 0.57.1 Seal Contracts Update patch notes. https://eremitegames.com/seal-contracts-update/
- ↑ 1.8.10 Hotfix patch notes. https://steamcommunity.com/games/1336490/announcements/detail/541113388287132035
- ↑ 6.0 6.1 Testing done by Discord user @Anteprefix. n=5 for Riverlands testing, n=1 for No Modifiers comparison.


