





Special Weapons: Difference between revisions
From MENACE Official Wiki
No edit summary |
|||
| (14 intermediate revisions by 3 users not shown) | |||
| Line 27: | Line 27: | ||
! {{H:title|Supply Cost|[[File:Supplies 64x64.png|center|30px]]}} | ! {{H:title|Supply Cost|[[File:Supplies 64x64.png|center|30px]]}} | ||
|- | |- | ||
| [[File: | | [[File:Weapon 20 tier 1 912x318.png|center|250px|link=Workshopped RPG]] [[Workshopped RPG]] || - || 2-7 || 80 || 160 || 95 || 35 || 1 || 1 || 15 || 0 || 5 || 40 || 25 | ||
|- | |- | ||
| [[File:Weapon 20 912x318.png|center| | | [[File:Weapon 20 912x318.png|center|250px|link=IMX SA-RPG 2]] [[IMX SA-RPG 2]] || - || 2-8 || 110 || 210|| 125 || 45 || 1 || 1 || 120 || 0 || 5 || 40 || 40 | ||
|- | |- | ||
| [[File:Weapon 09 tier1 912x318.png|center| | | [[File:Weapon 09 tier1 912x318.png|center|250px|link=L100 - PAL]] [[L100 - PAL]] || data-sort-value="1"| [[File:skill_deploy.png|center|24px|link=]] || 3-9 || 160 || 250 || 110 || 50 || 1 || 1 || 50 || 5 || 3 || 60 || 35 | ||
|- | |- | ||
| [[File:Weapon 09 | | [[File:Weapon 09 912x318.png|center|250px|link=L31 MAAL]] [[L31 MAAL]] || data-sort-value="1"| [[File:skill_deploy.png|center|24px|link=]] || 10|| 200 || 330 || 200 || 70 || 1 || 1 || 130 || 10 || 3 || 60 || 50 | ||
|- | |- | ||
| [[File:Weapon 38 912x318.png|center| | | [[File:Weapon 38 912x318.png|center|250px|link=AT-RGL]] [[AT-RGL]] || data-sort-value="2"| [[File:skill_deploy.png|center|24px|link=]] | ||
[[File:skill_31.png|center|24px|link=]] | [[File:skill_31.png|center|24px|link=]] | ||
|| 11 || 140 || 200|| 120|| 40 || 1 || 1 || 50|| 0 || 7 || {{H:title| | || 11 || 140 || 200|| 120|| 40 || 1 || 1 || 50|| 0 || 7 || {{H:title|Deploy / Fire|20/60}} || 35 | ||
|- | |- | ||
| [[File: | | [[File:Weapon 25 912x318.png|center|250px|link=Zayntech ASGM 2]] [[Zayntech ASGM 2]]|| data-sort-value="2"| [[File:skill_deploy.png|center|24px|link=]] | ||
[[File:skill_31.png|center|24px|link=]] | [[File:skill_31.png|center|24px|link=]] | ||
|| | || 4-11 || 220 || 300 || 180 || 50 || 1 || 1 || 65 || 0 || 3 || {{H:title|Deploy / Fire|20/60}} || 65 | ||
|} | |} | ||
| Line 62: | Line 62: | ||
! {{H:title|Supply Cost|[[File:Supplies 64x64.png|center|30px]]}} | ! {{H:title|Supply Cost|[[File:Supplies 64x64.png|center|30px]]}} | ||
|- | |- | ||
| [[File: | | [[File:Weapon 27 912x318.png|center|250px|link=Tripod MK20A3]] [[Tripod MK20A3]]|| data-sort-value="2"| [[File:skill_deploy.png|center|24px|link=]] | ||
[[File:skill_31.png|center|24px|link=]] | [[File:skill_31.png|center|24px|link=]] | ||
|| | || 10 || 60 || 70 || 45 || 15 || 1 || 3 || 50 || 0 || 8 || {{H:title|Deploy / Fire|20/40}} || 45 | ||
|- | |- | ||
|} | |} | ||
| Line 86: | Line 86: | ||
! {{H:title|Supply Cost|[[File:Supplies 64x64.png|center|30px]]}} | ! {{H:title|Supply Cost|[[File:Supplies 64x64.png|center|30px]]}} | ||
|- | |- | ||
| [[File:Weapon 11 | | [[File:Weapon 11 912x318.png|center|250px|link=EMP Rifle]] [[EMP Rifle]]|| - || 5 || 25|| 1|| 500 || 0|| 1 || 1 || 35|| -10 || 8 || 40 || 20 | ||
|- | |- | ||
| [[File: | | [[File:Weapon 03 912x318.png|center|250px|link=E4A2 ELSA]] [[E4A2 ELSA]]|| - || 8 || 40 || 80|| 35 || 15|| 1 || 3 || 130 || 0 || {{H:title|heat per use / max heat|2/6}} || {{H:title|fire / vent|40/60}} || 50 | ||
|- | |- | ||
| [[File:Weapon 36 912x318.png|center| | | [[File:Weapon 36 912x318.png|center|250px|link=Mining Laser]] [[Mining Laser]] || - || 7 || 130 || 200 || 140 || 20 || 1 || 1 || 20 || 0 || {{H:title|heat per use / max heat|3/4}} || {{H:title|fire / vent|40/40}} || 15 | ||
|- | |- | ||
| [[File:Laserlance | | [[File:Laserlance 912x318.png|center|250px|link=Tripod Laser Lance]] [[Tripod Laser Lance]]|| data-sort-value="2"| [[File:skill_deploy.png|center|24px|link=]] | ||
[[File:skill_31.png|center|24px|link=]] | [[File:skill_31.png|center|24px|link=]] | ||
|| 10 || 130 || 120 || 180 || 20 || 1 || 1 || 80 || 0 || {{H:title|heat per use / max heat|4/6}} || {{H:title| | || 10 || 130 || 120 || 180 || 20 || 1 || 1 || 80 || 0 || {{H:title|heat per use / max heat|4/6}} || {{H:title|Deploy / Fire / vent|20/60/60}} || 70 | ||
|} | |} | ||
| Line 115: | Line 115: | ||
! {{H:title|Supply Cost|[[File:Supplies 64x64.png|center|30px]]}} | ! {{H:title|Supply Cost|[[File:Supplies 64x64.png|center|30px]]}} | ||
|- | |- | ||
| [[File: | | [[File:Weapon 16 912x318.png|center|250px|link=Flamethrower]] [[Flamethrower]]|| - || 4 || 30 || 30 || 25 || 0 || 3 || 1 || 25 || 150 || 6 || 40 || 15 | ||
|- | |- | ||
|} | |} | ||
| Line 137: | Line 137: | ||
! {{H:title|Supply Cost|[[File:Supplies 64x64.png|center|30px]]}} | ! {{H:title|Supply Cost|[[File:Supplies 64x64.png|center|30px]]}} | ||
|- | |- | ||
| [[File: | | [[File:Weapon 10 912x318.png|center|250px|link=Gr331 ESG - Grenade Launcher]] [[Gr331 ESG - Grenade Launcher]]|| - || 3-8 || 30 || 35 || 30 || 50 || 1 || 1 || 50 || 25 || 7 || 40 || 35 | ||
|- | |- | ||
| [[File:Weapon 35 912x318.png|center| | | [[File:Weapon 35 912x318.png|center|250px|link=XGr-20 CDTE]][[XGr-20 CDTE]] || - || 2-8 || 12 || 30|| 20 || 10|| 1 || 2 || 60 || 10 || 6 || 40 || 50 | ||
|- | |- | ||
| [[File:Weapon 40 912x318.png|center| | | [[File:Weapon 40 912x318.png|center|250px|link=MK9MOD2 K-GMW]] [[MK9MOD2 K-GMW]] || data-sort-value="2"| [[File:skill_deploy.png|center|24px|link=]] | ||
[[File:skill_31.png|center|24px|link=]] | [[File:skill_31.png|center|24px|link=]] | ||
|| 3-10 || 30 || 35 || 30 || 50 || 1 || 3 || 50 || 0 || 8 || {{H:title| | || 3-10 || 30 || 35 || 30 || 50 || 1 || 3 || 50 || 0 || 8 || {{H:title|Deploy / Fire|20/40}} || 45 | ||
|} | |} | ||
| Line 167: | Line 165: | ||
! {{H:title|Supply Cost|[[File:Supplies 64x64.png|center|30px]]}} | ! {{H:title|Supply Cost|[[File:Supplies 64x64.png|center|30px]]}} | ||
|- | |- | ||
| [[File: | | [[File:Weapon 18 912x318.png|center|250px|link=Light Chaingun]] [[Light Chaingun]] || - || 7 || 13 || 7 || 26 || 7 || 1 || 7 || 15 || -10 || 12 || 20 || 25 | ||
|- | |- | ||
| [[File: | | [[File:Weapon 14 tier1 912x318.png|center|250px|link=M10E ESAW]] [[M10E ESAW]] || - || 7 || 12 || 9 || 28 || 10 || 1 || 15 || 30 || -25 || 8 || 40 || 20 | ||
|- | |- | ||
| [[File:Weapon 14 | | [[File:Weapon 14 912x318.png|center|250px|link=M320 SSW]] [[M320 SSW]] || - || 8 || 14 || 10 || 34 || 12 || 1 || 15 || 120 || -20 || 8 || 40 || 30 | ||
|- | |- | ||
| [[File:Weapon 41 | | [[File:Weapon 41 912x318.png|center|250px|link=M320 SSW SOC]] [[M320 SSW SOC]] || - || 8 || 14 || 10 || 34 || 12 || 1 || 15 || 180 || -10 || 8 || 40 || 40 | ||
|- | |- | ||
| [[File:Weapon 43 912x318.png|center| | | [[File:Weapon 43 912x318.png|center|250px|link=IAR]] [[IAR]] || - || 9 || 12 || 13 || 35 || 25 || 1 || 5 || 120 || -5 || 10 || 40 || 30 | ||
|- | |- | ||
| [[File: | | [[File:Weapon 06 tier1 912x318.png|center|250px|link=CMG50]] [[CMG50]] || data-sort-value="1"| [[File:skill_deploy.png|center|24px|link=]] || 8|| 14 || 12 || 34 || 15 || 1 || 12 || 30 || -20 || 8|| 40 || 30 | ||
|- | |- | ||
| [[File:Weapon 06 912x318.png|center| | | [[File:Weapon 06 912x318.png|center|250px|link=M80 EGPM]] [[M80 EGPM]] || data-sort-value="1"| [[File:skill_deploy.png|center|24px|link=]] || 9 || 16 || 14 || 40 || 17 || 1 || 12 || 120 || -15 || 8|| 40 || 45 | ||
|- | |- | ||
| [[File:Weapon 06 tripod mmg 912x318.png|center| | | [[File:Weapon 06 tripod mmg 912x318.png|center|250px|link=Tripod CMG50]] [[Tripod CMG50]] || data-sort-value="2"| [[File:skill_deploy.png|center|24px|link=]] | ||
[[File:skill_31.png|center|24px]] | [[File:skill_31.png|center|24px]] | ||
|| 8 || 14 || 12 || 34 || 15 || 1 || 12 || 35 || -10 || 12 || {{H:title| | || 8 || 14 || 12 || 34 || 15 || 1 || 12 || 35 || -10 || 12 || {{H:title|Deploy / Fire|20/40}} || 30 | ||
|- | |- | ||
| [[File: | | [[File:Weapon 39 912x318.png|center|250px|link=Tripod Griffin Minigun]] [[Tripod Griffin Minigun]] || data-sort-value="2"| [[File:skill_deploy.png|center|24px|link=]] | ||
[[File:skill_31.png|center|24px]] | [[File:skill_31.png|center|24px|link=]] | ||
|| 8|| 13 || 15 || 40 || 10 || 1 || 15 || 60 || -5 || 10(Heat) || {{H:title| | || 8|| 13 || 15 || 40 || 10 || 1 || 15 || 60 || -5 || 10(Heat) || {{H:title|Deploy / Salvo / Strafing|20/40/60}} || 50 | ||
|- | |- | ||
| [[File:Weapon 32 912x318.png|center| | | [[File:Weapon 32 912x318.png|center|250px|link=Tripod M6 CMG]] [[Tripod M6 CMG]] || data-sort-value="2"| [[File:skill_deploy.png|center|24px|link=]] | ||
[[File:skill_31.png|center|24px]] | [[File:skill_31.png|center|24px|link=]] | ||
|| 10|| 25 || 25 || 55 || 10 || 1 || 10 || 50 || -10 || 10 || {{H:title| | || 10|| 25 || 25 || 55 || 10 || 1 || 10 || 50 || -10 || 10 || {{H:title|Deploy / Fire|20/40}} || 40 | ||
|} | |} | ||
| Line 214: | Line 210: | ||
! {{H:title|Supply Cost|[[File:Supplies 64x64.png|center|30px]]}} | ! {{H:title|Supply Cost|[[File:Supplies 64x64.png|center|30px]]}} | ||
|- | |- | ||
| [[File: | | [[File:Weapon 15 912x318.png|center|250px|link=U60A1 HWCM]] [[U60A1 HWCM]] || data-sort-value="1"| [[File:skill_deploy.png|center|24px|link=]] || 6-11 || 10 || 15 || 8 || 25 || 0 || 1 || 55|| 0 || 12 || 40 || 25 | ||
|- | |- | ||
| [[File:Weapon 26 912x318.png|center| | | [[File:Weapon 26 912x318.png|center|250px|link=Kingpost M8]] [[Kingpost M8]] || data-sort-value="2"| [[File:skill_deploy.png|center|24px|link=]] | ||
[[File:skill_31.png|center|24px]] | [[File:skill_31.png|center|24px|link=]] | ||
|| 7-14 || 15 || 20 || 10 || 35 || 0 || 1 || 50 || 0 || 10 || {{H:title| | || 7-14 || 15 || 20 || 10 || 35 || 0 || 1 || 50 || 0 || 10 || {{H:title|Deploy / Fire|20/50}} || 40 | ||
|} | |} | ||
| Line 239: | Line 235: | ||
! {{H:title|Supply Cost|[[File:Supplies 64x64.png|center|30px]]}} | ! {{H:title|Supply Cost|[[File:Supplies 64x64.png|center|30px]]}} | ||
|- | |- | ||
| [[File:Weapon 33 912x318.png|center| | | [[File:Weapon 33 912x318.png|center|250px|link=K-SAS Designated Marksman Rifle]] [[K-SAS Designated Marksman Rifle]] || - || 10 || 25 || 25 || 45 || 8 || 1 || 2 || 45 || 10 || 12 || 40 || 25 | ||
|- | |- | ||
| [[File:Weapon 44 912x318.png|center| | | [[File:Weapon 44 912x318.png|center|250px|link=HM MK7MOD1 - SDMR]] [[HM MK7MOD1 - SDMR]] || - || 11 || 30 || 35 || 60 || 30 || 1 || 2 || 120|| 15 || 12 || 40 || 35 | ||
|- | |- | ||
| [[File: | | [[File:Weapon 13 912x318.png|center|250px|link=SR31 - HM SPR]] [[SR31 - HM SPR]] ||[[File:skill_deploy.png|center|24px|link=]] || 11 || 30 || 40 || 75 || 30 || 1 || 1 || 40 || 20 || 10 || 40 || 30 | ||
|- | |- | ||
| [[File:Weapon 08 912x318.png|center| | | [[File:Weapon 08 912x318.png|center|250px|link=SR41 KASS]] [[SR41 KASS]] ||[[File:skill_deploy.png|center|24px|link=]] || 12 || 40 || 50 || 85 || 35 || 1 || 1 || 125 || 30|| 10 || 40 || 35 | ||
|- | |- | ||
| [[File:Weapon 08 anti materiel rifle tier1 912x318.png|center| | | [[File:Weapon 08 anti materiel rifle tier1 912x318.png|center|250px|link=Anti-Materiel Rifle "Crocodile"]] [[Anti-Materiel Rifle "Crocodile"]] ||[[File:skill_deploy.png|center|24px|link=]] || 3-11 || 80 || 70 || 110 || 40 || 1 || 1 || 70 || -5 || 6 || 40 || 40 | ||
|} | |} | ||
| Line 268: | Line 264: | ||
! {{H:title|Supply Cost|[[File:Supplies 64x64.png|center|30px]]}} | ! {{H:title|Supply Cost|[[File:Supplies 64x64.png|center|30px]]}} | ||
|- | |- | ||
| [[File:Weapon 54 912x318.png|center| | | [[File:Weapon 54 912x318.png|center|250px|link=NDL - Stun Bomb Launcher]] [[NDL - Stun Bomb Launcher]]|| - || 8|| 0|| 0|| 0|| 50 || 1 || 1 || 120|| 25 || 6 || 40 || 40 | ||
|- | |- | ||
| [[File:Weapon 48 912x318.png|center| | | [[File:Weapon 48 912x318.png|center|250px|link=MOD-C MAAL HE-Rocket Launcher]] [[MOD-C MAAL HE-Rocket Launcher]] || data-sort-value="1"| [[File:skill_deploy.png|center|24px|link=]] || 10 || 120 || 60|| 80 || 70 || 1 || 1 || 120|| 10 || 3 || 60 || 55 | ||
|} | |} | ||
[[Category:Special Weapons|Category: Special Weapons]] | [[Category:Special Weapons|Category: Special Weapons]] | ||
Latest revision as of 18:59, 20 August 2026
Click here to go back to Weapons.
Infantry Specials (or Special Weapons) are generally speaking more powerful, but also more specialized and cumbersome than infantry weapons. For a complete breakdown of currently used Weapon/Accessory tags or to search for a specific tag see here.
Anti-Tank
| Name | StUp | Rng | HP Dmg | Armor Dmg | Armor Pen | Supp | Elems Hit | RoF | Trade Val | Acc Mod | Ammo | AP Cost |  |
|---|---|---|---|---|---|---|---|---|---|---|---|---|---|
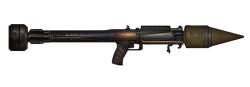 |
- | 2-7 | 80 | 160 | 95 | 35 | 1 | 1 | 15 | 0 | 5 | 40 | 25 |
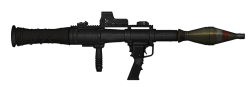 |
- | 2-8 | 110 | 210 | 125 | 45 | 1 | 1 | 120 | 0 | 5 | 40 | 40 |
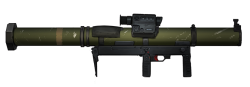 |
 |
3-9 | 160 | 250 | 110 | 50 | 1 | 1 | 50 | 5 | 3 | 60 | 35 |
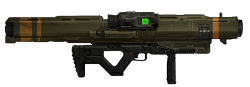 |
|
10 | 200 | 330 | 200 | 70 | 1 | 1 | 130 | 10 | 3 | 60 | 50 |
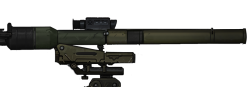 |
 |
11 | 140 | 200 | 120 | 40 | 1 | 1 | 50 | 0 | 7 | 20/60 | 35 |
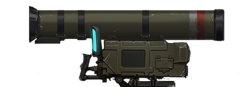 |
|
4-11 | 220 | 300 | 180 | 50 | 1 | 1 | 65 | 0 | 3 | 20/60 | 65 |
Autocannon
| Name | StUp | Rng | HP Dmg | Armor Dmg | Armor Pen | Supp | Elems Hit | RoF | Trade Val | Acc Mod | Ammo | AP Cost | |
|---|---|---|---|---|---|---|---|---|---|---|---|---|---|
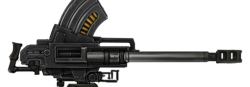 |
|
10 | 60 | 70 | 45 | 15 | 1 | 3 | 50 | 0 | 8 | 20/40 | 45 |
Energy
| Name | StUp | Rng | HP Dmg | Armor Dmg | Armor Pen | Supp | Elems Hit | RoF | Trade Val | Acc Mod | Ammo | AP Cost | |
|---|---|---|---|---|---|---|---|---|---|---|---|---|---|
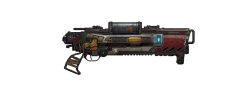 |
- | 5 | 25 | 1 | 500 | 0 | 1 | 1 | 35 | -10 | 8 | 40 | 20 |
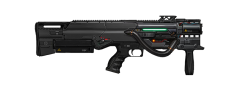 |
- | 8 | 40 | 80 | 35 | 15 | 1 | 3 | 130 | 0 | 2/6 | 40/60 | 50 |
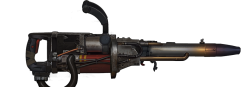 |
- | 7 | 130 | 200 | 140 | 20 | 1 | 1 | 20 | 0 | 3/4 | 40/40 | 15 |
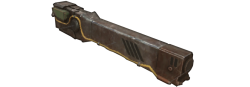 |
|
10 | 130 | 120 | 180 | 20 | 1 | 1 | 80 | 0 | 4/6 | 20/60/60 | 70 |
Flamethrower
| Name | StUp | Rng | HP Dmg | Armor Dmg | Armor Pen | Supp | Elems Hit | RoF | Trade Val | Acc Mod | Ammo | AP Cost | |
|---|---|---|---|---|---|---|---|---|---|---|---|---|---|
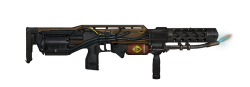 |
- | 4 | 30 | 30 | 25 | 0 | 3 | 1 | 25 | 150 | 6 | 40 | 15 |
Grenade Launcher
| Name | StUp | Rng | HP Dmg | Armor Dmg | Armor Pen | Supp | Elems Hit | RoF | Trade Val | Acc Mod | Ammo | AP Cost | |
|---|---|---|---|---|---|---|---|---|---|---|---|---|---|
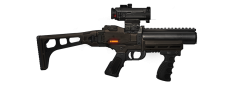 |
- | 3-8 | 30 | 35 | 30 | 50 | 1 | 1 | 50 | 25 | 7 | 40 | 35 |
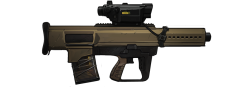 |
- | 2-8 | 12 | 30 | 20 | 10 | 1 | 2 | 60 | 10 | 6 | 40 | 50 |
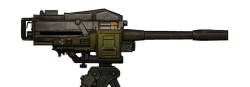 |
|
3-10 | 30 | 35 | 30 | 50 | 1 | 3 | 50 | 0 | 8 | 20/40 | 45 |
Machine Gun
| Name | StUp | Rng | HP Dmg | Armor Dmg | Armor Pen | Supp | Elems Hit | RoF | Trade Val | Acc Mod | Ammo | AP Cost | |
|---|---|---|---|---|---|---|---|---|---|---|---|---|---|
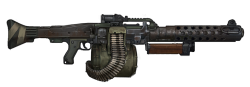 |
- | 7 | 13 | 7 | 26 | 7 | 1 | 7 | 15 | -10 | 12 | 20 | 25 |
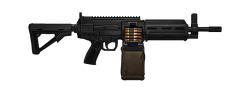 |
- | 7 | 12 | 9 | 28 | 10 | 1 | 15 | 30 | -25 | 8 | 40 | 20 |
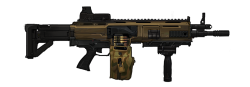 |
- | 8 | 14 | 10 | 34 | 12 | 1 | 15 | 120 | -20 | 8 | 40 | 30 |
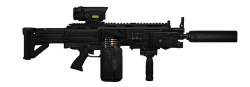 |
- | 8 | 14 | 10 | 34 | 12 | 1 | 15 | 180 | -10 | 8 | 40 | 40 |
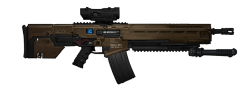 |
- | 9 | 12 | 13 | 35 | 25 | 1 | 5 | 120 | -5 | 10 | 40 | 30 |
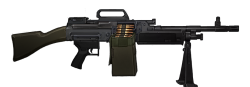 |
|
8 | 14 | 12 | 34 | 15 | 1 | 12 | 30 | -20 | 8 | 40 | 30 |
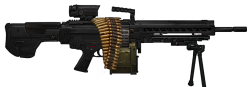 |
|
9 | 16 | 14 | 40 | 17 | 1 | 12 | 120 | -15 | 8 | 40 | 45 |
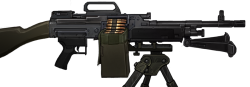 |
 |
8 | 14 | 12 | 34 | 15 | 1 | 12 | 35 | -10 | 12 | 20/40 | 30 |
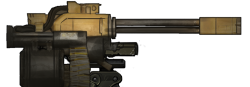 |
|
8 | 13 | 15 | 40 | 10 | 1 | 15 | 60 | -5 | 10(Heat) | 20/40/60 | 50 |
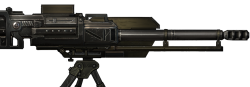 |
|
10 | 25 | 25 | 55 | 10 | 1 | 10 | 50 | -10 | 10 | 20/40 | 40 |
Mortars
| Name | StUp | Rng | HP Dmg | Armor Dmg | Armor Pen | Supp | Elems Hit | RoF | Trade Val | Acc Mod | Ammo | AP Cost | |
|---|---|---|---|---|---|---|---|---|---|---|---|---|---|
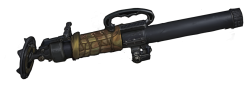 |
|
6-11 | 10 | 15 | 8 | 25 | 0 | 1 | 55 | 0 | 12 | 40 | 25 |
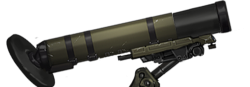 |
|
7-14 | 15 | 20 | 10 | 35 | 0 | 1 | 50 | 0 | 10 | 20/50 | 40 |
Sniper Rifle
| Name | StUp | Rng | HP Dmg | Armor Dmg | Armor Pen | Supp | Elems Hit | RoF | Trade Val | Acc Mod | Ammo | AP Cost | |
|---|---|---|---|---|---|---|---|---|---|---|---|---|---|
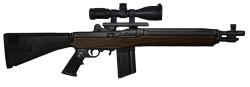 |
- | 10 | 25 | 25 | 45 | 8 | 1 | 2 | 45 | 10 | 12 | 40 | 25 |
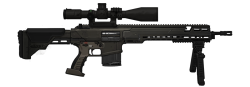 |
- | 11 | 30 | 35 | 60 | 30 | 1 | 2 | 120 | 15 | 12 | 40 | 35 |
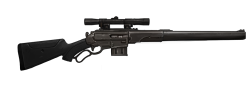 |
|
11 | 30 | 40 | 75 | 30 | 1 | 1 | 40 | 20 | 10 | 40 | 30 |
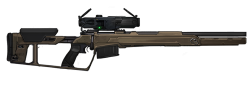 |
|
12 | 40 | 50 | 85 | 35 | 1 | 1 | 125 | 30 | 10 | 40 | 35 |
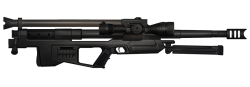 |
|
3-11 | 80 | 70 | 110 | 40 | 1 | 1 | 70 | -5 | 6 | 40 | 40 |
Crafted Weapons
| Name | StUp | Rng | HP Dmg | Armor Dmg | Armor Pen | Supp | Elems Hit | RoF | Trade Val | Acc Mod | Ammo | AP Cost | |
|---|---|---|---|---|---|---|---|---|---|---|---|---|---|
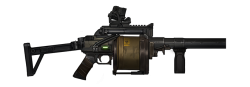 |
- | 8 | 0 | 0 | 0 | 50 | 1 | 1 | 120 | 25 | 6 | 40 | 40 |
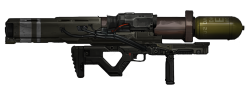 |
|
10 | 120 | 60 | 80 | 70 | 1 | 1 | 120 | 10 | 3 | 60 | 55 |


