Map Encounters
Overview

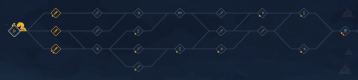
Every run takes place through a map. Every map consists of about 16 randomized encounters, from which the player has limited choices of which route to take. After starting a new run, the player typically has three options for their next encounter, but that initial choice restricts the routes that can be taken and thus access to later encounters. For example, taking the top route in the first section may prevent access to a Chop Shop until the final encounter before the boss. Players have to balance their choice of their next encounter with the choice of the route access they want to save for the rest of the run.
In the demo, the run is broken up into two sections, with boss encounters at the end of both.
Along the way, besides the type of encounter, indicated by the icon, there are also green, yellow, and red indicators on some of the encounters that indicate bonuses, changes to expectations, and extra difficulties. Each dot is explained by the map from the beginning of the run, leaving no unpleasant surprises. For example, an encounter with a green dot may reward the payer with 20 bonus scrap. A yellow dot may indicate that a canyon is at the bottom of the grid, meaning it is both narrower than usual but also presents different options during a fight. A red dot may indicate that all train movement takes +1  or offers no rewards.
-
 First section of a map
-
 Second section of a map


Encounters
The following are the encounters types in the demo. All encounters are either some sort of fight or some sort of safe zone. In all safe zones, train units can be repaired.
List of Encounters
| Icon | Name | Fight or Safe? | In-game description | Note |
|---|---|---|---|---|
 |
Pit Stop | Safe Zone |
|
The run starts here. |
 |
Fight | Fight |
|
The most common encounter. |
 |
Convoy | Fight |
|
A harder fight that can reward a new module for your train. |
 |
Chop Shop | Safe Zone |
|
The more common of the safe zones. Repair the train in safe zones. |
 |
Central Station | Safe Zone |
|
The less common safe zone sells carriages instead of cards and modules. |
 |
Random Encounter | Safe Zone |
|
The rarest encounter is a safe zone with special options. |
 |
Boss | Fight |
|
A significantly harder fight, always with a red dot, but there is a pit stop after. |