Map Encounters
Overview

Every run takes place through a map. Every map consists of about 16 randomized encounters, from which the player has limited choices of which route to take. After starting a new run, the player typically has three options for their next encounter, but that initial choice restricts the routes that can be taken and thus access to later encounters. For example, taking the top route in the first section may prevent access to a Chop Shop until the final encounter before the boss. Players have to balance their choice of their next encounter with the choice of the route access they want to save for the rest of the run.
In the demo, the run is broken up into two sections, with boss encounters at the end of both.
Along the way, besides the type of encounter, indicated by the icon, there are also green, yellow, and red indicators on some of the encounters that indicate bonuses, changes to expectations, and extra difficulties. Each dot is explained by the map from the beginning of the run, leaving no unpleasant surprises. For example, an encounter with a green dot may reward the payer with 20 bonus scrap. A yellow dot may indicate that a canyon is at the bottom of the grid, meaning it is both narrower than usual but also presents different options during a fight. A red dot may indicate that all train movement takes +1  or offers no rewards.
-
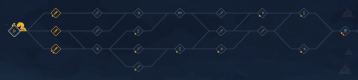 First section of a map
-
 Second section of a map


Encounters
The following are the encounters types in the demo. All encounters are either some sort of fight or some sort of safe zone. In all safe zones, train units can be repaired.
List of encounters
| Icon | Name | Fight or Safe? | In-game description | Note |
|---|---|---|---|---|
 |
Pit Stop | Safe Zone |
|
The run starts here. |
 |
Fight | Fight |
|
The most common encounter. |
 |
Convoy | Fight |
|
A harder fight that can reward a new module for your train. |
 |
Chop Shop | Safe Zone |
|
The more common of the safe zones. Repair the train in safe zones. |
 |
Central Station | Safe Zone |
|
The less common safe zone sells carriages instead of cards and modules. |
 |
Random Encounter | Safe Zone |
|
The rarest encounter is a safe zone with special options. |
 |
Boss | Fight |
|
A significantly harder fight, always with a red dot, but there is a pit stop after. |
Green-dot bonuses
Green dots on the map are bonuses, rewards, or other beneficial effects for completing or reaching the encounter.
| Title | Note |
|---|---|
| Extra scrap | +20 bonus scrap for winning the fight. |
| Card remove reward | Remove one card from the deck after winning the fight. |
| Card remove available | The Chop Shop offers removing one card from the deck for 45 scrap. |
| Rare card in shop guaranteed | The Chop Shop has at least one rare, expensive card or module for sale. |
| Card duplication available | Duplicate one card in your deck after winning the fight. |
| Card transform reward | Win the fight and change a card into another card. |
| Card transform available | The Chop Shop offers changing one card into another card for 45 scrap. |
| Card modification reward | The Chop Shop offers one choice of random modifications from three random cards from the deck. |
| 10% discount on carriages | The Central Station's prices to buy new carriages is 90 instead of 100 scrap. |
| Increased rounds till enemy escape | More chances to destroy the bandits for rewards. |
Yellow-dot warnings
Yellow dots on the map are uncommon changes to the grid of the fight that can be both helpful or harmful depending on circumstances.
| Title | Note |
|---|---|
| Cliffs run along the top | Top row of the grid is blocked, but moving enemies into the cliffs causes 1 damage. |
| A canyon at the bottom | Bottom row of the grid is blocked, but moving enemies into it destroys them instantly. |
-
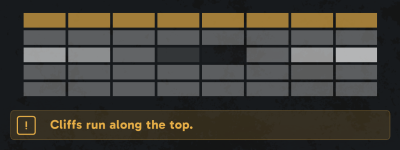 Cliffs run along the top
-
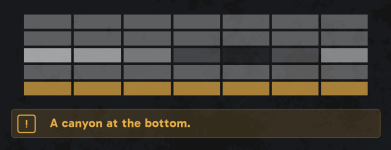 A canyon at the bottom


Red-dot penalties
Red dots on the map are significant impediments or penalties to the fight.
| Title | Note |
|---|---|
| No rewards | Winning the fight offers no scrap or new card--only scrap from destroying bandits. |
| Narrow grid | Instead of four, five, or six cells tall, this grid is only three cells tall. |
| Fewer rounds till enemy escape | Fewer chances to destroy the bandits to get rewards. |
| Enemy support unit confirmed | Instead of a chance for a support unit, the Boss is guaranteed to be accompanied by one. |
| First round AP -1 | The Boss penalizes the train during its first turn. |
| Movement cost +1 | The Boss penalizes movement during the entire fight. |
-
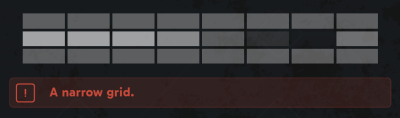 A narrow grid (bandits always closer)
-
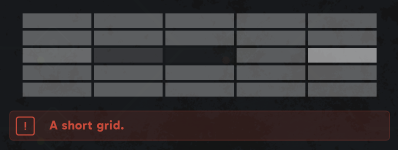 A short grid (train can't move as far)